SQLite is a Database Management System (DBMS) used to store and manage data in a structured format. The lite in SQLite means lightweight in terms of setup, database administration, and required resources.
SQLite allows developers to create databases, organize data into tables, and perform operations like inserting, updating, and querying data. It is easy to use and does not require a separate server to run. It is perfect for applications that need to store data locally on a device, like mobile apps or desktop software. SQLite is also fast and reliable.
SQLite is a type of Relational Database Management System (RDBMS). A RDBMS allows the user to store data in tables made up of rows and columns and supports SQL (Structured Query Language) to manipulate the data. It allows users to store, manage, and retrieve data in a structured format organized into tables with rows and columns. Users can define relationships between different tables, perform queries to retrieve specific data, and execute transactions to ensure data integrity.
SQLite was created in the year 2000 by D. Richard Hipp, who continues to lead the development of the software today. He created SQLite to provide a simple, lightweight, and efficient database solution that could be embedded into software applications without requiring a separate server. Hipp designed SQLite to be fast, reliable, and easy to use, making it suitable for a wide range of projects and environments.
SQLite is like a small, lightweight tool for managing data in simple applications. It struggles with lots of users accessing data at once and isn’t great for huge amounts of information. It is best for small projects where simplicity is more important than handling lots of data or users.
SQLite databases are stored as single files on our computer or device. When we create a SQLite database, it is saved as a single file with a .sqlite or .db extension. This file contains all the tables, rows, and other database objects we have defined, as well as the data we have inserted into the database. We can move, copy, or share SQLite database files just like any other file on our computer.
Why SQLite?
SQLite is lightweight, serverless and self-contained, making it an excellent choice for developers looking to embed a database system within their applications. SQLite commands are fundamental in manipulating data stored relational database management system (RDBMS).
SQLite is popular for several reasons. They are as follows –
- Simplicity − It is easy to set up and use, making it accessible to developers of all skill levels.
- Portability − SQLite databases are self-contained files that can be easily shared and transferred between different systems, making it convenient for use in various environments.
- No Server Required − Unlike MySQL, PostgreSQL, SQLite does not require a separate server to run, reducing setup complexity and resource requirements.
- Efficiency − SQLite is lightweight and optimized for performance, allowing for fast data access and manipulation, even in resource-constrained environments.
- Flexibility − It supports a wide range of SQL features and data types, making it suitable for a variety of applications, from mobile apps to desktop software to embedded systems.
How to Installation SQLite on Windows:
If we want to install the official SQLite and interact with the database using the terminal, we can follow these steps:
- Visit the official website of SQLite to download the zip file.
- Download that zip file.
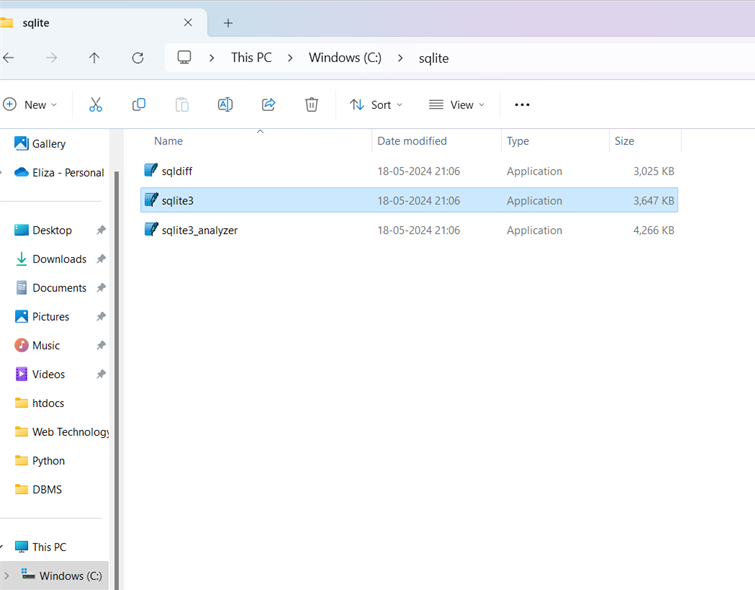
- Create a folder in C or D (wherever we want) for storing SQLite by expanding the zip file.
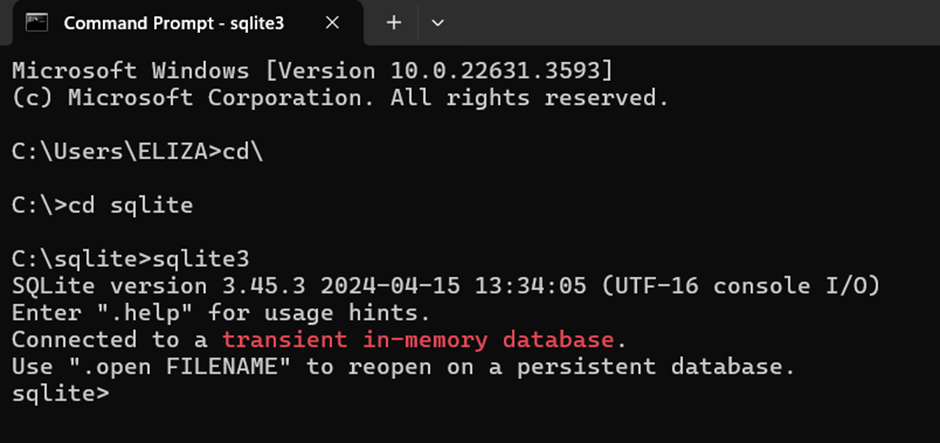
- Open the command prompt and set the path for the location of the SQLite folder given in the previous step. After that write “sqlite3” and press enter.
We can also directly open the .exe file from the folder where you have stored the SQLite whole thing.
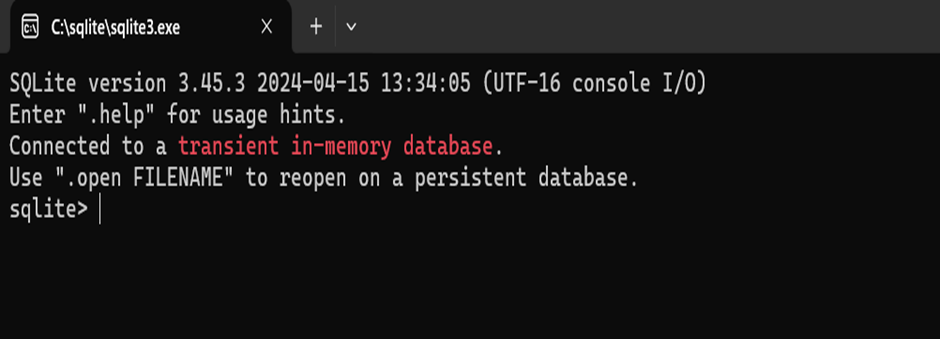
After clicking on the selected .exe file it will open SQLite application.
SQLite Commands:
The standard SQLite commands CREATE, INSERT, SELECT, UPDATE, DELETE and DROP. These commands can be classified into groups based on their operational nature –
DDL – Data Definition Language:
In SQLite, DDL commands are used to define(create), modify or delete (drop) database objects. CREATE TABLE, DROP TABLE are some of the DDL commands.
| Commands | Description |
| CREATE | Creates a new table, a view of a table, or other object in database. |
| ALTER | Modifies an existing database object, such as a table. |
| DROP | Deletes an entire table, a view of a table or other object in the database. |
DML – Data Manipulation Language:
DML commands are used to manipulate data within a table.
| Commands | Description |
| INSERT | Insert a record |
| UPDATE | Modifies records |
| DELETE | Deletes record |
DCL – Data Control Language
DCL is used to control the kind of data access to the database. DCL statements such as GRANT and REVOKE are used to make changes to a user’s permissions on a table.
DQL – Data Query Language:
DQL is used to retrieve data from the database.
| Command | Description |
| SELECT | Retrieves records from one or more tables |
TCL – Transaction Control Language:
COMMIT, ROLLBACK and SAVEPOINT are considered as TCL commands. When dealing with transactions within a database COMMIT and ROLLBACK commands are used.
Creating a Table:
SQLite CREATE TABLE statement is used to create a new table. Creating a basic table involves naming the table and defining its columns and each column’s data type.
Syntax:
CREATE TABLE table_name (column1 datatype, column2 datatype, column3 datatype, ….. , columnN datatype );
Example:
sqlite> CREATE TABLE STUDENT ( ROLL INT, NAME TEXT, ADDRESS TEXT, DOB DATE );
The above command creates a table named “STUDENT” with four columns: ROLL, NAME, ADDRESS, and DOB.
SQLite Show Tables:
We can verify if the table has been created successfully using SQLite command .tables command.
sqlite>.tables
STUDENT
Show the Structure of the Table:
Using .schema command:
SQLite offers a dot-command .schema that can display the structure/schema of the table.
Syntax:
sqlite>.schema table_name
Example:
sqlite> .schema student
CREATE TABLE STUDENT (ROLL INT, NAME TEXT, ADDRESS TEXT, DOB DATE);
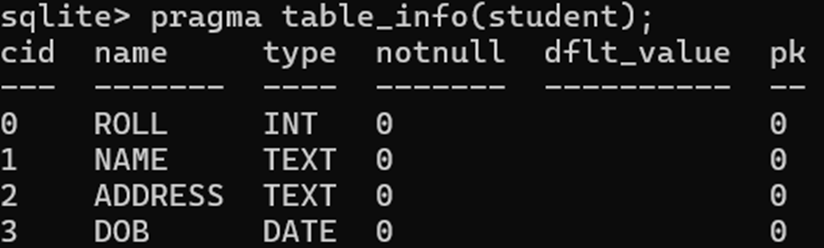
Using PRAGMA Command
We can also use PRAGMA command with the table_info() function to get the details and description of a table. But it is necessary to execute another command (.mode column) before the PRAGMA command to make the output understandable and clear.
This command is a dot-command which is used to set the mode as Columns, which will display the entire table with the column name and space separated, which is much more human readable.
After executing .mode column command, now we can use the pragma command to get more detailed and structured result.
Syntax:
pragma table_info (table_name);
sqlite> pragma table_info (student);
DROP a TABLE:
DROP TABLE statement is used to remove a table definition.
Syntax:
DROP TABLE TABLE_NAME;
Example
sqlite>DROP TABLE STUDENT;
Add Data to the Table:
INSERT INTO Statement is used to add data into a table.
Syntax:
Following are the two basic syntaxes of INSERT INTO statement.
Method1:
INSERT INTO TABLE_NAME(column1, column2, column3, … columnN) VALUES (value1, value2, value3,…valueN);
Here, column1, column2,…columnN are the names of the columns in the table into which we want to insert data.
Example:
sqlite> INSERT INTO STUDENT(ROLL,NAME) VALUES(1,’SAMEER’);
Method 2:
We may not need to specify the column(s) name in the SQLite query if we are adding values for all the columns of the table.
INSERT INTO TABLE_NAME VALUES (value1, value2, value3, … valueN);
Example:
sqlite> INSERT INTO STUDENT VALUES (2,’PRIYANKA’,’ASSAM’,’2-2-2000′);
Formatting Output:
We can use the following sequence of dot commands to format output.
sqlite>.header on
sqlite>.mode column
Setting Output Column Width:
Sometimes, we will face a problem related to the truncated output in case of .mode column which happens because of default width of the column to be displayed. What we can do is, we can set column displayable column width using .width num, num…. command as follows −
sqlite>.width 10, 20, 10
View data From the Table:
SQLite SELECT statement is used to fetch the data from a SQLite database table.
To retrieve data of specific columns, following syntax can be used
SELECT column1, column2, columnN FROM table_name;
Here, column1, column2 … are the fields of a table, whose values we want to fetch.
Example:
sqlite> SELECT ROLL, NAME FROM STUDENT;
If we want to retrieve all the data from a table, then we can use the following syntax:
SELECT * FROM table_name;
Example:
sqlite> SELECT *FROM STUDENT;
SQLite – WHERE Clause
WHERE clause is used to specify a condition for the retrieval of data. If the given condition is satisfied, means true, then it returns the specific value from the table. We have to use WHERE clause to filter the records and fetching only necessary records.
The WHERE clause not only is used in SELECT statement, but it is also used in UPDATE, DELETE statement.
Syntax:
Following is the basic syntax of SQLite SELECT statement with WHERE clause.
SELECT column1, column2, columnN FROM table_name WHERE [condition]
Example:
sqlite> SELECT NAME, ADDRESS FROM STUDENT WHERE ROLL=2;
We can retrieve all the records from the table using where clause also.
Syntax:
SELECT *FROM table_nameWHERE [condition]
Example:
sqlite> SELECT *FROM STUDENT WHERE ROLL=2;
Update Data in the Table:
SQLite UPDATE command is used to change (modify) the existing data in a table. We can use WHERE clause with UPDATE command to update selected rows, otherwise all the rows would be updated.
Users must be careful in the use of the Update statement as all the rows in the table can be affected if a WHERE clause is not specified in the UPDATE statement.
Syntax:
Following is the basic syntax of UPDATE command with WHERE clause.
UPDATE table_name SET column_name = value where [condition];
Example:
sqlite> UPDATE STUDENT SET ADDRESS=’DELHI’ WHERE ROLL=1;
Multiple columns can be updated by specifying all the columns and values separated by commas.
Syntax:
UPDATE table_name SET column1 = value1, column2 = value2…., columnN = valueN WHERE [condition];
Example:
sqlite> UPDATE STUDENT SET ADDRESS=’ASSAM’, DOB=’1-1-2000′ WHERE ROLL=1;
Delete Records from a Table:
DELETE command is used to delete the existing records from a table.
Syntax:
DELETE FROM table_name;
Example:
sqlite> DELETE FROM STUDENT;
This example deletes all records from the table student.
We can use WHERE clause with DELETE command to delete the selected records, otherwise all the records would be deleted.
Syntax:
DELETE FROM table_name WHERE [condition];
Example:
sqlite> DELETE FROM STUDENT WHERE ROLL=2;
TRUNCATE TABLE Command
TRUNCATE TABLE command removes all rows from a table. We do not have TRUNCATE TABLE command in SQLite but we can use DELETE command to delete all rows from an existing table. TRUNCATE TABLE is functionally identical to DELETE statement without a WHERE clause: both remove all rows in the table.
TRUNCATE TABLE and DELETE statement removes all rows from a table, but the table structure and its columns remain. To remove table definition and its data, use the DROP TABLE command.
Syntax:
sqlite> TRUNCATE TABLE table_name;
Example:
sqlite> TRUNCATE TABLE STUDENT;
AND & OR Operators
SQLite AND and OR operators are used to combine multiple conditions. These two operators are called conjunctive operators.
These operators provide a means to make multiple comparisons with different operators in the same SQLite statement.
AND Operator
The AND operator allows the existence of multiple conditions in a SQLite statement’s WHERE clause. While using AND operator, complete condition will be assumed true when all the conditions are true. For example, [condition1] AND [condition2] will be true only when both condition1 and condition2 are true.
Syntax:
Following is the basic syntax of AND operator with WHERE clause.
SELECT *FROM table_name WHERE [condition1] AND [condition2]…AND [conditionN];
We can combine N number of conditions using AND operator. For an action to be taken by the SQLite statement, whether it be a transaction or query, all conditions separated by the AND must be TRUE.
Example:
sqlite> SELECT *FROM STUDENT WHERE NAME=’PRIYA’ AND ADDRESS=’ASSAM’;
OR Operator
The OR operator is also used to combine multiple conditions in a SQLite statement’s WHERE clause. While using OR operator, complete condition will be assumed true when at least any of the conditions is true. For example, [condition1] OR [condition2] will be true if either condition1 or condition2 is true.
Syntax:
Following is the basic syntax of OR operator with WHERE clause.
SELECT * FROM table_nameWHERE [condition1] OR [condition2]…OR [conditionN]
We can combine N number of conditions using OR operator. For an action to be taken by the SQLite statement, whether it be a transaction or query, only any ONE of the conditions separated by the OR must be TRUE.
Example:
sqlite> SELECT *FROM STUDENT WHERE ADDRESS=’ASSAM’ OR ADDRESS=’ARUNACHAL’;
SQLite – LIKE Clause
SQLite LIKE operator is used to match text values against a pattern using wildcards. If the search expression can be matched to the pattern expression, the LIKE operator will return true.
There are two wildcards used in conjunction with the LIKE operator −
- The percent sign (%)
- The underscore (_)
The percent sign(%) represents zero, one, or multiple numbers or characters. The underscore ( _ ) represents a single number or character. These symbols can be used in combinations.
SELECT column1, column2….columnNFROM table_nameWHERE column_name LIKE { PATTERN };
To retrieve records where name begins with P and followed by any other character.
Example: PRIYANKA, PRIYA, PRIYASHREE, PRIYAMONI
sqlite> SELECT NAME, ADDRESS FROM STUDENT WHERE NAME LIKE ‘P%’;
To retrieve records where name ends with A.
Example: PRIYANKA, PRIYA, PUJA, LALITA
sqlite> SELECT NAME, ADDRESS FROM STUDENT WHERE NAME LIKE ‘%A’;
To retrieve records where name contains the word PRIYA.
Example: PRIYANKA, PRIYA, PRIYASHREE, PRIYAMONI
sqlite> SELECT NAME, ADDRESS FROM STUDENT WHERE NAME LIKE ‘%PRIYA%’;
SQLite – ORDER BY Clause
ORDER BY clause is used for sorting the data in an ascending or descending order, based on one or more columns.
Syntax:
Following is the basic syntax of ORDER BY clause.
SELECT column1, column2….columnN FROM table_name ORDER BY column_name {ASC|DESC};
Example:
To sort the student data, in the alphabetic order of state.
sqlite> SELECT NAME, ADDRESS FROM STUDENT ORDER BY ADDRESS;
By default, sorting is in the ascending order of the specified key field, i.e., STATE
To sort in the descending order, include the clause, desc.
sqlite> SELECT NAME, ADDRESS FROM STUDENT ORDER BY ADDRESS DESC;
SQLite BETWEEN Clause
BETWEEN is used to retrieve records which fall within a range.
Syntax:
SELECT column1, column2….columnN FROM table_name WHERE column_name BETWEEN val-1 AND val-2;
Example:
sqlite> SELECT NAME, ADDRESS FROM STUDENT WHERE ROLL BETWEEN 2 AND 6;
sqlite> SELECT *FROM STUDENT WHERE ROLL BETWEEN 4 AND 6;
SQLite IN Clause:
The IN operator is used to specify a list of possible values for a column.
Example:
SELECT column1, column2….columnN FROM table_name WHERE column_name IN (val-1, val-2,…val-N);
SELECT * FROM STUDENT WHERE ADDRESS IN(‘TSK’,’DBR’,’GHY’);
SQLite – GROUP BY Clause
SQLite GROUP BY clause is used in collaboration with the SELECT statement to arrange identical data into groups.
GROUP BY clause follows the WHERE clause in a SELECT statement and precedes the ORDER BY clause.
Syntax:
Following is the basic syntax of GROUP BY clause. GROUP BY clause must follow the conditions in the WHERE clause and must precede ORDER BY clause if one is used.
SELECT column-list FROM table_name WHERE [ conditions ] GROUP BY column1, column2….columnN ORDER BY column1, column2….columnN
We can use more than one column in the GROUP BY clause.
SQLite – HAVING Clause
HAVING clause enables us to specify conditions that filter which group results appear in the final results.
The WHERE clause places conditions on the selected columns, whereas the HAVING clause places conditions on groups created by GROUP BY clause.
HAVING clause must follow GROUP BY clause in a query and must also precede ORDER BY clause if used.
Following is the syntax of the SELECT statement, including HAVING clause.
SELECT column1, column2 FROM table_name WHERE [ conditions ] GROUP BY column1, column2 HAVING [ conditions ] ORDER BY column1, column2
SQLite – DISTINCT Keyword
SQLite DISTINCT keyword is used in conjunction with SELECT statement to eliminate all the duplicate records and fetching only the unique records.
There may be a situation when we have multiple duplicate records in a table. While fetching such records, it makes more sense to fetch only unique records instead of fetching duplicate records.
Syntax:
Following is the basic syntax of DISTINCT keyword to eliminate duplicate records.
SELECT DISTINCT column1, column2,…..columnN FROM table_name WHERE [condition]
SQLite – ALTER TABLE Command
By using an SQLite ALTER TABLE statement, we can perform two actions:
- Rename a table.
- Add a new column to a table.
Using SQLite ALTER TABLE to rename a table
To rename a table, we use the following ALTER TABLE RENAME TO statement:
ALTER TABLE existing_table RENAME TO new_table;
Using SQLite ALTER TABLE to add a new column to a table
We can use the SQLite ALTER TABLE statement to add a new column to an existing table. In this scenario, SQLite appends the new column at the end of the existing column list.
The following illustrates the syntax of ALTER TABLE ADD COLUMN statement:
ALTER TABLE table_name ADD COLUMN column_definition;
SQLite – Views
Views are logical tables of data extracted from existing tables. It can be quired just like a table, but does not require disk space.
A view can contain all rows of a table or selected rows from one or more tables. A view can be created from one or many tables which depends on the written SQLite query to create a view.
Creating Views
SQLite views are created using the CREATE VIEW statement. SQLite views can be created from a single table, multiple tables, or another view.
Following is the basic CREATE VIEW syntax.
CREATE VIEW view_name AS query;
CREATE VIEW view_name AS SELECT column1, column2…..FROM table_name WHERE [condition];
Example:
CREATE VIEW STD_VIEW AS SELECT roll, name, address from student;
Display View:
SELECT * FROM view_name;
Example:
SELECT * FROM std_view;
Dropping Views/ Delete Views
To drop a view, simply use the DROP VIEW statement with the view_name. The basic DROP VIEW syntax is as follows −
sqlite> DROP VIEW view_name;
Example:
sqlite> DROP VIEW std_view
allegheny county real estate Hi there to all, for the reason that I am genuinely keen of reading this website’s post to be updated on a regular basis. It carries pleasant stuff.
Techarp Awesome! Its genuinely remarkable post, I have got much clear idea regarding from this post . Techarp