HTML stands for HyperText Markup Language. It is a markup language used to create static web pages. It is the most widely used language to design web pages. HTML is the basic building block of the web. HTML is used for defining the structure of all the content of a web page or a collection of web pages (website).
The backbone of the World Wide Web is made of HTML files, which are specially formatted documents that can contain links, as well as images and other media. HTML played a crucial role in the development of the World Wide Web.
HTML(HyperText Markup Language), as its name suggests, is a markup language. HTML is the World Wide Web’s core markup language. The HTML documents are linked to one another. This is the reason these links are called hypertext.
HyperText refers to the way in which web pages (HTML documents) are linked together. When we click a link in a web page, we are using hypertext. So, hypertext is simply a piece of text that works as a link. Clicking on the links takes us somewhere else in the vast web of pages.
Markup Language describes how HTML works. Markup languages are the languages that build the web. With a markup language, we simply “mark up” a text document with tags that tell a web browser how to structure it to display. So, markup language is a way of writing layout information within documents. The most widely known markup language today is HTML and XML.
HTML is a method where ordinary text can be converted into hypertext. It is a set of special codes included to control the layout and appearance of the text. Technically, HTML is not a programming language. It combines instructions within data to instruct the browser (A display program), how to render the data that the document contains.
Brief History of HTML:
The history of HTML can be traced back to the early days of the internet. Here is a brief overview of its evolution:
1991: HTML 1.0 – The Original Specification:
- In 1991, Tim Berners-Lee released the first version of HTML, known as HTML 1.0. It included basic elements like headings, paragraphs, lists, and links.
- This early version was relatively simple, with limited formatting options.
1995: HTML 2.0 – Expanding Capabilities:
- The Internet Engineering Task Force (IETF) published HTML 2.0 as an official specification in November 1995.
- HTML 2.0 introduced features such as tables, text alignment, and forms.
1997-1999: HTML 4.0 – Standardization and Features:
- HTML 4.0, released in 1997, marked a significant step forward. It introduced features like style sheets, scripting, and the separation of structure (HTML), presentation (CSS), and behavior (JavaScript).
- HTML 4.01, a minor revision, was released in 1999.
2008: HTML5 – A Major Overhaul:
- In 2008, the Web Hypertext Application Technology Working Group (WHATWG) started working on HTML5, a major revision aimed at addressing the shortcomings of previous versions.
- HTML5 introduced new elements, attributes, and APIs to enhance multimedia, graphics, and interactivity.
- The HTML5 specification was finalized in 2014.
HTML5 is the latest version of HTML and includes new features and improvements to existing features. Some key differences between HTML and HTML5 include support for multimedia elements (such as video and audio), improved semantics, and better support for mobile devices. HTML5 introduces a number of new elements and attributes that helps in building modern websites.
Why HTML is used?
HyperText Markup Language is the computer language that facilitates website creation. The language, which has code words and syntax just like any other language, is relatively easy to comprehend and, as time goes on, increasingly powerful in what it allows someone to create.
HTML is the primary markup language found on the internet. Every HTML page has a series of elements that create the content structure of a web page or application. HTML is a beginner-friendly language with plenty of support and is mainly used for static website pages. HTML works best together with CSS for the styling and JavaScript for the functionality.
It is a standard markup language for web page creation. It allows the creation and structure of sections, paragraphs, and links using HTML elements (the building blocks of a web page) such as tags and attributes.
HTML has a lot of uses:
- Web development. Developers use HTML code to design how a browser displays web page elements, such as text, hyperlinks, and media files.
- Internet navigation. Users can easily navigate and insert links between related pages and websites as HTML is heavily used to embed hyperlinks.
- Web documentation. HTML makes it possible to organize and format documents, similarly to Microsoft Word.
Features of HTML
- HTML is not case-sensitive language, meaning <html> is equivalent to <HTML>.
- HTML is platform-independent because we can view it on any operating system. HTML can run on nearly all the OS.
- HTML follows a tree-like structure. The HTML tag acts as a root element, then head and body tags act as child elements of the head tag, and so on.
- HTML language is easy to understand and learn.
- HTML tags contain display information (or render information) that is useful to browsers like Chrome, Firefox, etc.
- It facilitates users to add images, videos, and hyper images to web pages which makes it awesome and more user-friendly.
Advantages of HTML (Pros of HTML):
Easy to Learn: HTML is a beginner-friendly language. We can quickly grasp the basics and start creating simple web pages.
Widespread Use: HTML is the backbone of the web. Almost every website uses HTML, so it’s one of the most important skills for web development.
Platform Independence: HTML is platform-independent, meaning it can be rendered on any device or operating system with a compatible web browser. This universality ensures that websites built with HTML can reach a broad audience.
Simple Syntax: The syntax (structure and rules) of HTML is straightforward.
Compatibility: HTML is highly compatible with other technologies and languages commonly used in web development, such as CSS (Cascading Style Sheets) for styling and JavaScript for interactivity. This compatibility enables developers to create rich, dynamic web experiences.
Scalability: HTML scales well with the size and complexity of web projects. Whether building a simple personal webpage or a large-scale enterprise application, HTML can accommodate various requirements and evolve alongside the project’s needs.
Versatility: HTML can be used in conjunction with other technologies to create a wide range of web content, including static web pages, dynamic web applications, multimedia presentations, and more. Its versatility makes it suitable for diverse use cases in web development.
Disadvantages of HTML (Cons of HTML)
Limited Styling: HTML primarily focuses on structure and content, lacking advanced styling capabilities. While CSS can be used for styling, HTML itself has limited control over visual presentation, which may require additional effort to achieve desired design.
Static nature: HTML creates static web pages. Additional technologies like JavaScript will be required if we want more active and engaging features.
Limited Interactivity: While HTML supports basic interactivity through forms and links, creating highly interactive web applications typically requires additional client-side or server-side scripting.
Difficulty in Maintenance: As web projects grow in size and complexity, maintaining HTML code can become challenging, especially without proper organization and documentation.
Dependence on External Resources: HTML-based web pages often rely on external resources such as CSS frameworks, JavaScript libraries, and content delivery networks (CDNs) for enhanced functionality and performance.
What is Tag?
Tag is the most basic unit of an HTML webpage. HTML contains several tags for different specific purposes. These tags provide display information to the browser, meaning each tag has predefined display information, e.g. <a> tag defines hyperlink which is used to navigate to other web pages.
A webpage can contain text, graphics, audio, video and animations. Through a markup language, we can mark up such contents to indicate how they should appear over a web page. To mark up the contents, we can use various commands, called Markup Indicator or TAG. So, HTML tags are basically HTML based commands or keywords surrounded by angel brackets like <HTML>.
Tag or Tag element refers to the HTML codes that define the element in an HTML file, such as headings, images, paragraphs and list. Every tag consists of a tag name, sometimes followed by an optional list of tag attributes or properties, all placed between opening and closing brackets (< and >). The simplest tag is nothing more than a name appropriately enclosed in brackets, such as <HEAD> and <I>. More complicated tags contain one or more attributes, which specify or modify the behavior of the tag.
According to the HTML standard, tag and attribute names are not case-sensitive. There is no effect between <head>, <Head> and <HEAD>, or even <HeaD>; they are all equivalent.
Types of Tags:
There are two kinds of tags:
- Paired/ Container Tags
- Unpaired / Empty Tags
Paired/ Container Tags:
HTML tags normally come in pairs like <HTML> and </HTML>. Such types of tags are called Paired or Container Tags. These actually consist of two tags, a start tag and an end tag which enclose the text they affect. The first tag in a pair is the Start tag and the second tag is the End tag. The End tag is written like the start tag, with a forward slash before the tag name. Start and End tags are also called Opening tags and Closing tags.
Format of Paired/Container Tag:
<tagname> Content </tagname>
Example:
<B>Hello</B>
Unpaired / Empty Tags:
An unpaired or empty tag refers to a tag, which does not have an ending/closing tag.
Format of Paired/Container Tag:
<tagname>
Example:
<BR>
Notes: HTML tags are not case sensitive
Attributes:
Attributes are important part of HTML elements. An attribute is used to define the characteristics of an element and is always placed inside the element’s opening tag. Attributes provides additional information about an element. Attribute allows us to specify how web browsers should treat a particular tag. Normally attributes may have a string value, they can have even empty string as value.
Example:
<BODY BGCOLOR=”RED”>
In this example, <BODY> element carries an attribute whose name is BGCOLOR, which we can set to use the background color of the web page. Here, the value set to BGCOLOR attribute is “RED”. This means the background color of the web page will be RED.
Structure of HTML Document
Every HTML document or page has a basic structure. An HTML document starts and end with <HTML> and </HTML> tags. These tags tell the browser that the entire document is composed in HTML. Inside these two tags, the document is split into two sections:
- Header Section
- Body Section
Header Section: This section defines the <HEAD>…</HEAD> elements, which contain information about the document such as title of the document, author of the document etc.
Body Section: This section defines the <BODY>…</BODY> elements, which contain the content of the document that we see on the screen.
Example:
<HTML>
<HEAD>
<TITLE>MY FIRST WEBPAGE</TITLE>
</HEAD>
<BODY>
<H1>Hi….WELCOME TO HTML</H1>
</BODY>
</HTML>
Creating HTML Document:
Creating an HTML document is a very easy process. To create an HTML document, generally we need the following software tools:
- Text Editor
- Web Browser
Text Editor: To write or edit the HTML code, we need a simple text- editor,like Notepad (A standard program comes with windows operating system). We can also use some professional HTML editors like Notepad ++, Adobe Dreamweaver, Microsoft FrontPage etc. There are plenty of free HTML editors available for creating web pages. Notepad++ is the simplest one to be used by beginners. An HTML editor helps in creating web pages. The most basic capability an HTML editor provides is syntax correction, or a spellcheck tool for code. They also typically offer syntax tracking, which highlights different parts of code, making it easier to read by separating the different parts line by line. And they usually allow to insert or autocomplete common HTML elements.
Web Browser: The purpose of a web browser (such as Google Chrome, Internet Explorer, Firefox, Safari) is to read HTML documents and display them as web pages. The browser does not display the HTML tags, but uses the tags to determine how the content of the HTML page is to be presented or displayed to the user.
Here are the simple steps to create a basic HTML document (Using Notepad):
Step 1: Open Notepad / Notepad++
Step 2: Write HTML Code
Step 3: Save HTML Code. Save the HTML file with either the .htm or the .html file extension under an appropriate folder.
Step 4: Run HTML File in Web Browser
HTML Document Tags:
All HTML document should include at least these tags:
- <HTML>
- <HEAD>
- <TITLE>
- <BODY>
These tags define what type of document it is, and the major sections of the document.
<HTML>:
The <HTML> tag defines the top-most element, identifying it as an HTML document. It is a container tag that has a start and an end tag and all the other tags nested within it.
The <HTML> tag is the main container or containing element for the whole HTML document. It represents the root of an HTML document. It simply tells the browser that this is an HTML document. Each HTML document should have one <HTML> tag and each document should end with a closing </HTML> tag.
Syntax:
<HTML>
…………
</HTML>
<HEAD>:
All HTML documents are divided into two parts, the head and body. Web browsers use them to interpret documents properly. The <HEAD>tag contains general information about the HTML file. The <HEAD>tag is nested within the HTML tag.
The <HEAD> tag is just a container for all other header elements. It simply defines the header section of the HTML document. Usually, the only tag contained within the head tag is the title tag. Other tags also can be contained within the <HEAD> tag but they are used less often. <HEAD> tag contains any combination of the following tags, in any order:
(a) <LINK>: The <LINK> tag is used to link to an external file, such as a style sheet or JavaScript file. It allows users to link their document to other resources.
(b) <STYLE>: The <STYLE> tag is used to include CSS rules inside the HTML document. This tag is used to embed style assets to the document.
(c) <SCRIPT>: The <SCRIPT> tag is used to include JavaScript or VBScript inside the HTML document
(d) <META>: The <META> tag includes information about the document such as keywords and a description, which are particularly helpful for search applications.
Syntax:
<HTML>
<HEAD>
…………
</HEAD>
</HTML>
<TITLE>:
The <TITLE> tag is used to set a title for every HTML document. It represents the document’s title or name. The <TITLE> tag defines a title in the browser’s title bar. The <TITLE> tag should contain only the text for the title and it may not contain any other elements. It is always good to use titles that identify the document.
<TITLE> tag is nested within the <HEAD> tag. It identifies our page to the rest of the world. The tag output is displayed on web browsers title bar but does not appear as part of the page.
Syntax:
<HTML>
<HEAD>
<TITLE>
Title of the Web Page
</TITLE>
</HEAD>
</HTML>
<BODY>:
The <BODY> tag appears after the <HEAD> tag. It defines the body section of HTML document i.e., it simply defines the document’s body. The <BODY> tag contains the web pages actual content such as text, hyperlinks, images, tables, list etc. The <BODY> tag can have the following attributes.
<BODY> tag Attributes:
| Attributes | Value | Description |
| bgcolor | color_name | Sets the background color of a document |
| background | filename or URL | Sets the background image of a document |
| text | color_name | Sets the color of the text in a document |
| link | color_name | Sets the color of unvisited links in a document |
| alink | color_name | Sets the color of an active links in a document |
| vlink | color_name | Sets the color of visited links in a document |
Syntax:
<HTML>
<HEAD>
<TITLE>
My First Web Page
</TITLE>
</HEAD>
<BODY>
………………
</BODY>
</HTML>
Example 1:
<HTML>
<HEAD>
<TITLE>Attributes of the Body Tag</TITLE>
</HEAD>
<BODY BGCOLOR= “AQUA” TEXT= “RED” >
This is an HTMLPage
</BODY>
</HTML>
Example 2: Using a Background Image
<HTML>
<HEAD>
<TITLE>
Attributes of the Body Tag
</TITLE>
</HEAD>
<BODY BACKGROUND= “nature.jpg”>
This is an HTML Page
</BODY>
</HTML>
HTML Headings:
Headings break a document into sections. Generally, a book uses heading and subheadings to divide each chapter into sections, and we can do the same with web page.
Headings are important in HTML documents. Almost every document starts with a heading. We can use different sizes for headings. HTML defines six levels of headings. The heading elements are H1, H2, H3, H4, H5, and H6 with H1 being the highest (or most important) level and H6 the least.
We can use headings to organize our web into hierarchical levels. The top-level heading (H1) actually is the title of our page, i.e., it is appears in a browser window at the top of the web page. We can also use a second level heading (denoted by the H2 tag) to define a major division in the page, and a third level heading (using the H3 tag) to define a sublevel division within a major division. Most browsers support upto six different levels.
By default, most browsers use Times New Roman fonts for headings. The font size decreases as the heading level increases. (Default sizes for first-through sixth-level headings are, respectively, 24, 18, 14, 12, 10, and 8 point font)
Note: While displaying any heading, browsers automatically adds one line before and after the heading)
Align Attribute:
The HTML <h1> to <h6> align Attribute is used to specify the alignment of the <h> element or the content present inside the Heading Element.
Syntax
Following is the syntax for the heading alignment in HTML.
<h1 align=”left | right | center | justify”>
Example:
<HTML>
<HEAD>
<TITLE>Headings in HTML</TITLE>
</HEAD>
<BODY>
<H1> This is a top-level Heading</H1>
<H2> This is a top-level Heading</H2>
<H3> This is a top-level Heading</H3>
<H4> This is a top-level Heading</H4>
<H5> This is a top-level Heading</H5>
<H6> This is a top-level Heading</H6>
</BODY>
</HTML>
HTML Paragraphs:
In HTML, paragraphs are defined with the <p> tag. The <p> tag is a container element, but with an implied ending. We do not have to include the </p> end tag. Any following start tag that defines a new block element implies the end of the tag. So, when we use the <p> tag, just insert the <p> start tag at the beginning of a paragraph but leave of the </p> at the end.
Align Attribute of <p>
The align attribute was used to specify how paragraph text should be aligned horizontally within the <p> element.
| Attribute Values | Description |
| left | It sets the text left-align. |
| right | It sets the text right-align. |
| center | It sets the text center-align. |
| justify | It is used to set text to both left and right margin of the page. |
Example:
<HTML>
<HEAD>
<TITLE> Paragraphs in HTML</TITLE>
</HEAD>
<BODY>
<H1> Introduction to HTML </H1>
<P align= “center”> HTML stands for Hypertext Markup Language, and it is the most widely used language to design web pages. The backbone of the World Wide Web is made of HTML files, which are specially formatted documents that can contain links, as well as images and other media.
<P align=”right”> Hypertext refers to the way in which web pages (HTML documents) are linked together. When we click a link in a web page, we are using hypertext. So, hypertext is simply a piece of text that works as a link.
<P align= “justify”> Markup language describes how HTML works. Markup languages are the languages that build the web. With a markup language, we simply “mark up” a text document with tags that tell a web browser how to structure it to display. So, markup language is a way of writing layout information within documents. The most widely known markup language today is HTML and XML.
</BODY>
</HTML>
HTML Line Breaks:
To break a line <BR> tag is used. Whenever we use the <BR> tag, anything following it starts on the next line. The <BR> tag is an empty tag, it has no end tag.
Example:
<p> For further details contact <BR>
E. Begum <BR> Tinsukia<BR> Assam
HTML Horizontal Rule:
The HTML <HR> tag is used for creating a horizontal line. The <HR> tag is a stand-alone or empty element that allows us to add horizontal rules to web pages. A horizontal rule is a good option to break a page into logical sections or to separate headers and footers from the rest of the page.
Changing the Height of a Horizontal Rule:
To change the height of a horizontal rule, the SIZE attribute value in the <HR> tag can be used. The value we set is the rule’s height or thickness in pixels. The following example is used for creating a horizontal rule that is 10 pixels thick.
Example:
<P>This is a normal rule:
<HR>
<P>This is a 10-pixel thick horizontal rule:
<HR SIZE= “10”>
Changing the width of a Horizontal Rule:
We can change the width of a horizontal rule, either by setting the width in actual pixels or by specifying a percentage of the total width of the browser window. By default, horizontal rules are centered in the browser window. Following is an example of creating a 15-pixel sized horizontal rule with a width that is 75 percent of a browser’s window.
Example:
<P>This is a 75% wide, 15-pixel thick horizontal rule:
<HR WIDTH= “75%” SIZE= “15” >
Changing Between Shaded and Unshaded Horizontal Rule:
The default setting for a rule is “shaded”. To set an “unshaded” horizontal rule, add the NOSHADE attribute to the <HR>tag.
Example:
<P>This is an unshaded, 15-pixel thick horizontal rule:
<HR>
<P>This is a 10-pixel thick horizontal rule:
<HR SIZE= “15” NOSHADE>
Setting the Alignment of a Horizontal Rule:
The ALIGN attribute in the <HR> tag is used to left-align or right-align a horizontal rule (center alignment is the default).
Example:
<P>This is a left-aligned, 50% wide, 20-pixel thick horizontal rule (Shaded)
<HR ALIGN= “LEFT” WIDTH= “50%” SIZE= “20”>
<HR> Attributes:
| Attributes | Value | Description |
| Size | pixels or % | Specifies the height of a <HR> element |
| Width | pixels or % | Specifies the width of a <HR> element |
| Align | left center right | Specifies the alignment of a <HR> element |
| Color | color_name | Specifies the color of the <HR> element |
| Noshade | noshade | Specifies that <HR> element should render in one solid color (noshaded), instead of a shaded color. |
Example: HTML Line Breaks and Horizontal Rule
<HTML>
<HEAD>
<TITLE>Line Break and Horizontal Rule</TITLE>
</HEAD>
<BODY>
GOOD MORNING <BR>
HAVE A NICE DAY<BR>
<HR ALIGN= “LEFT” SIZE= “10%” WIDTH= “80%”>
GOOD NIGHT <BR>
SWEET DREAMS<BR>
<HR ALIGN= “LEFT” SIZE= “20%” WIDTH= “90%” NOSHADE COLOR= “BLUE”>
</BODY>
</HTML>
HTML Comments:
Comments can be inserted in the HTML code to make it more readable and understandable. We can use comments to explain code, which can help us when we edit the source code at a later stage. This is especially useful if we have a lot of code. Comments are ignored by the browser and are not displayed.
HTML comments line are indicated by the special beginning tag <!– and ending tag –>. We can comment multiple lines by the special beginning tag <!– and ending tag –>.
Example:
<HTML>
<HEAD>
<TITLE>HTML Comments </TITLE>
</HEAD>
<BODY>
<!– This Single Line Comment will not be displayed.–>
<!– This Multi Line Comment
will not be displayed
–>
<P> This is a regular paragraph
</BODY>
</HTML>
Text Formatting / Formatting Texts:
When it comes to formatting a web page using HTML code, we can think of it in the same way we would look at formatting a document formatted by a word processor.
HTML uses tags like <B> and <I> for formatting output, like bold or italic text. These HTML tags are called Formatting tags. HTML has two ways to include italic or bold text on web page. The first way involves using literal tags: the B (Bold) tags and I (Italic). The second way is to use logical tags: the EM (emphasis) and Strong tags. Most browsers displays the I (italic) and EM (Emphasis) tags identically, just as they display the B (Bold) and strong tags identically.
The following table depicts a list of Formatting tags commonly used in HTML:
| Tag | Description |
| <B> | To Bold Text |
| <I> | To Italic Text |
| <U> | To Underline Text |
| <STRONG> | To define important text (Same as Bold) |
| <EM> | To Emphasized Text. (Same as Italic) |
| <BIG> | To define Bigger Text |
| <SMALL> | To define Smaller Text |
| <SUB> | To define subscripted Text |
| <SUP> | To define superscripted Text |
| <PRE> | To define preformatted Text |
| <MARK> | To mark or highlight the important text |
| <STRIKE> | To strike through text |
| <DIV> | The <div> tag defines a division or a section in an HTML document. |
| <CENTER> | To set text/image as Center Aligned |
| <DEL> | To identify text that has been deleted from a document but retained to show the history of modifications made to the document. |
| <INS> | used to identify text that has been inserted into a document. It is often paired with a <del> element which identifies deleted text replaced by the text contained in the <ins> element. |
Example:
<HTML>
<HEAD>
<TITLE>Formatting Texts</TITLE>
</HEAD>
<BODY>
<B>Bold Text</B><BR>
<I>Italic Text</I><BR>
<U>Underline Text</U><BR>
<FONT COLOR= “GREEN” SIZE= “5” FACE= “ARIAL”> Welcome To Assam</FONT><BR>
<STRONG> Strong Text usually rendered bold</STRONG><BR>
<EM>Emphasized text, usually rendered italic</EM><BR>
<BIG> Puts text in bigger font</BIG><BR>
<SMALL> Puts text in smaller font</SMALL><BR>
H<SUB>2</SUB>O<BR>
X<SUP>2</SUP>Y<BR>
<STRIKE>Strike through text</STRIKE><BR>
<CENTER>Center-Aligned</CENTER><BR>
<PRE>
HAVE
A
NICE
DAY
</PRE>
</BODY>
</HTML>
Block Quotes:
The Blockquote (Block Quote) tag double indents a block of text from both margins.
Example:
<HTML>
<HEAD>
<TITLE> Block Quote Tag </TITLE>
</HEAD>
<BODY>
<H1> Introduction to HTML </H1>
<BLOCKQUOTE>
<P> HTML stands for Hypertext Markup Language, and it is the most widely used language to design web pages. The backbone of the World Wide Web is made of HTML files, which are specially formatted documents that can contain links, as well as images and other media.
<P> Hypertext refers to the way in which web pages (HTML documents) are linked together. When we click a link in a web page, we are using hypertext. So, hypertext is simply a piece of text that works as a link.
</BLOCKQUOTE>
</BODY>
</HTML>
Working with Texts:
Text alignment:
We can align paragraphs, headings in a number of ways. We can use the ALIGN attribute with paragraphs or headings to center-align, right-align, left-align and justify align.
Example:
To center align a level-two heading
<H2 ALIGN= “CENTER”> Heading </H2>
To right align a level-two heading
<H2 ALIGN= “RIGHT”> Heading </H2>
CENTERING TEXT and Other Elements using the <CENTER> tag:
The <CENTER> tag is used to center-align text and other document elements.
Example:
<HTML>
<HEAD>
<TITLE>My First Webpage</TITLE>
</HEAD>
<BODY>
<CENTER>
<H1 >Level-One Heading</H1>
<p> This paragraph and the level-one heading above it is centered using the center tag. We can align paragraphs, headings in a number of ways. We can use the ALIGN attribute with paragraphs or headings to center-align, right-align or left-align.
</CENTER>
</BODY>
</HTML>
Changing Font sizes and Colors:
The <FONT> tag allows to specify the size and color of a section of text.
Setting Font Sizes:
The <FONT> tag uses the SIZE attribute to change the size of a font. We can set font sizes using absolute or relative size values.
Setting Absolute Font sizes:
There are seven “absolute” ( or fixed) sizes, numbered from 1 to 7, that we can set using the SIZE attribute of the <FONT> tag. The default is 3 , which is the same as regular paragraph text; 1 is the smallest and 7 is the largest.
Example:
<HTML>
<HEAD>
<TITLE>My Web Page</TITLE>
</HEAD>
<BODY>
<P>
<FONT SIZE= “1”> Font Size 1.</FONT> <BR>
<FONT SIZE= “2”> Font Size 2.</FONT> <BR>
<FONT SIZE= “3”> Font Size 3.</FONT> <BR>
<FONT SIZE= “4”> Font Size 4.</FONT> <BR>
<FONT SIZE= “5”> Font Size 5.</FONT> <BR>
<FONT SIZE= “6”> Font Size 6.</FONT> <BR>
<FONT SIZE= “7”> Font Size 7.</FONT> <BR>
</BODY>
</HTML>
Changing the FONT Color:
The <FONT> tag uses the COLOR attribute to change the color of a font.
Setting the Font Color Using color names:
We can use any one of 16 color names to specify a font color. Besides black and white, we also can specify aqua, blue, fuchsia, gray, green, lime, maroon, navy, olive, purple, red, silver, teal and yellow.
Example:
<HTML>
<HEAD>
<TITLE> Paragraphs in HTML</TITLE>
</HEAD>
<BODY>
<H1> HTML </H1>
<P> <FONT SIZE= “5” COLOR= “GREEN” FACE= “MONOTYPE CORSIVA”>Welcome to Beautiful World</FONT>HTML stands for Hypertext Markup Language, and it is the most widely used language to design web pages. The backbone of the World Wide Web is made of HTML files, which are specially formatted documents that can contain links, as well as images and other media.
<P> <FONT SIZE= “6” COLOR=”BLUE” FACE= “MV BOLI”>Hypertext refers to the way in which web pages (HTML documents) are linked together. When we click a link in a web page, we are using hypertext. So, hypertext is simply a piece of text that works as a link.
</BODY>
</HTML>
Inserting Special Characters:
In HTML, special characters that have special meanings (such as <, >, &, etc.) need to be represented using character entities to avoid parsing errors. There are literally hundreds of special character entities currently available. HTML special characters were introduced with HTML 4.0 in December 1997. They provided a standardized way of representing characters outside the commonly used ASCII encoding.
In HTML, these special characters are referred to as entities, and they are created by using codes beginning with an ampersand (&), followed by an entity name or an entity number, and ending with a semicolon. The entity names and entity numbers both represent the same thing; we can use either one.
HTML special characters are assigned an entity name and an entity number, both of which can be used to render the character in an HTML document. These codes and names have a specific format, which is generally represented as &#xxxx; for numbers and &xxxx; for names, where xxxx is either a name or a number. Numbers are valid in both decimal and hexadecimal format.
For example, the code for a right-facing arrow, also known as the ‘greater than’ sign, is > for the entity number and > for the entity name. Inserting the code for either of those into an HTML document will render a ‘>’ when displayed to the user.
Common HTML special characters:
| Character | Description | Entity Number | Entity Name |
| “ | Double quotation | " | " |
| ‘ | Single quoation | ' | ' |
| & | ampersand | & | & |
| © | copyright | © | © |
| ® | registered symbol | ® | ® |
| ™ | trademark | ™ | ™ |
| non-breaking space |   | | |
| < | less than | < | < |
| > | greater than | > | > |
Note: Entity names are case sensitive.
Adding Emojis to Webpage:
We can also display emojis using an entity code. All emojis have a numeric entity code in HTML, but not all of them have a named entity code. Some examples include:
| Symbol | Numeric Entity Code |
| 😀 | 😀 |
| 😁 | 😁 |
| 😂 | 😂 |
| 😃 | 😃 |
| 😄 | 😄 |
| 😅 | 😅 |
| 😆 | 😆 |
| 😇 | 😇 |
| 😈 | 😈 |
| 😉 | 😉 |
| 😐 | 😐 |
| 😑 | 😑 |
| 😒 | 😒 |
| 😓 | 😓 |
| 😔 | 😔 |
| 😕 | 😕 |
| 😖 | 😖 |
| 😗 | 😗 |
| 😘 | 😘 |
| 😙 | 😙 |
| 😠 | 😠 |
Example:
<html>
<head>
<title>My first web page</title>
</head>
<body>
<h1> Special Characters </h1>
<p>Copyright symbol: ©</p>
<p>Ampersand symbol: &</p>
<p>Trademark symbol: ™</p>
<p>Registered symbol: ®</p>
<p>Smiling Face: 😃</p>
<p>Laughing Face: 😆</p>
</body>
</html>
Creating Lists:
Lists are powerful tools used to organize similar kinds of information i.e., lists are used to group related pieces of information together, so they are clearly associated with each other and easy to read.
Types of Lists:
HTML supports of three types of lists:
- Ordered List
- Unordered List
- Definition List
Ordered List:
An Ordered List is a numbered list. Use a Ordered List when the order or priority of items is important. In HTML, an ordered list starts with the <OL> tag. The <OL> tag defines sequentially numbered list of items. It is used in conjunction with the <LI> (LIST Item) tag, which is used to tag the individual list items in a list. The list items are marked with numbers. The numbering starts at one and is incremented by one for each successive list item.
We can use the TYPE attribute with <OL>tag to specify the type of numbers for an Ordered List. The values that we can use with the TYPE attribute are “A”, “a”, “I”, “i” for uppercase letters, lowercase letters, uppercase Roman numerals, lowercase Roman numerals. By default it is generic number.
By default, index for list items begins with first number or initial character. We can use START attribute with <OL>tag to specify the beginning of any index. The START attribute in an <OL>tag is used to start the numbering sequence at a particular number.
Example:
<HTML>
<HEAD>
<TITLE>Ordered List in HTML</TITLE>
</HEAD>
<BODY>
<OL>
<LI> C PROGRAMMING
<LI> DATABASE MANAGEMENT
<LI> NETWORKING
<LI> WEB TECHNOLOY
<LI> MOBILE TECHNOLOGY
</OL>
<OL TYPE= “a”>
<LI> C PROGRAMMING
<LI> DATABASE MANAGEMENT
<LI> NETWORKING
<LI> WEB TECHNOLOY
<LI> MOBILE TECHNOLOGY
</OL>
<OL TYPE= “i”>
<LI> C PROGRAMMING
<LI> DATABASE MANAGEMENT
<LI> NETWORKING
<LI> WEB TECHNOLOY
<LI> MOBILE TECHNOLOGY
</OL>
<OL START= “11”>
<LI> C PROGRAMMING
<LI> DATABASE MANAGEMENT
<LI> NETWORKING
<LI> WEB TECHNOLOY
<LI> MOBILE TECHNOLOGY
</OL>
<BODY>
</HTML>
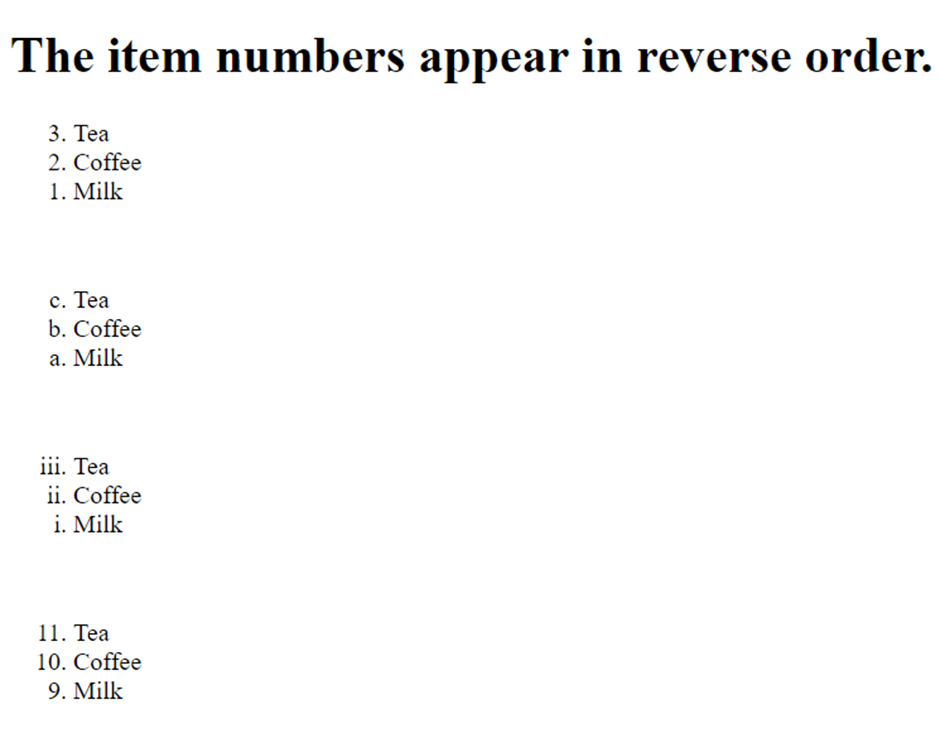
<ol> reversed Attribute/ Reversing an ordered list in HTML
The reversed attribute of the <ol> tag in HTML is used to set reversed ordering of list items in an ordered list. The items themselves are not reversed, only the numbering.
Example:
<html>
<body>
<h1> The item numbers appear in reverse order. </h1>
<ol reversed>
<li>Tea
<li>Coffee
<li>Milk
</ol>
<br>
<ol type=”a” reversed>
<li>Tea
<li>Coffee
<li>Milk
</ol>
<br>
<ol type=”i” reversed>
<li>Tea
<li>Coffee
<li>Milk
</ol>
<br>
<ol start=”11″ reversed>
<li>Tea
<li>Coffee
<li>Milk
</ol>
</body>
</html>
Output:
Unordered List:
An Unordered List is a collection of related items that have no special order or sequence. This list is created by using <UL> tag. The <UL> tag defines a bulleted list of items. The <LI> (List Item) tag is nested inside the <UL> tag and defines each item within the list.
The bullet itself comes in three types: “disc”, “circle” and “square”. The TYPE attribute is used with <UL> tag to specify the type of bullet. By default it is a “disc”.
Example:
<HTML>
<HEAD>
<TITLE>Unordered List in HTML</TITLE>
</HEAD>
<BODY>
<UL>
<LI> C PROGRAMMING
<LI> DATABASE MANAGEMENT
<LI> NETWORKING
<LI> WEB TECHNOLOY
<LI> MOBILE TECHNOLOGY
</UL>
<UL TYPE= “circle”>
<LI> C PROGRAMMING
<LI> DATABASE MANAGEMENT
<LI> NETWORKING
<LI> WEB TECHNOLOY
<LI> MOBILE TECHNOLOGY
</UL>
<UL TYPE= “square”>
<LI> C PROGRAMMING
<LI> DATABASE MANAGEMENT
<LI> NETWORKING
<LI> WEB TECHNOLOY
<LI> MOBILE TECHNOLOGY
</UL>
<BODY>
</HTML>
Nesting Lists:
We can nest a list inside another list. The browser automatically indents nested list levels. We can nest the same or different kinds of lists.
Example 1:
<HTML>
<HEAD>
<TITLE> Nesting List in HTML </TITLE>
</HEAD>
<BODY>
<UL>
<LI>SOFTWARE
<OL>
<LI> C PROGRAMMING
<LI> DATABASE MANAGEMENT
<LI> NETWORKING
<LI> WEB TECHNOLOY
<LI> MOBILE TECHNOLOGY
</OL>
<LI> HARDWARE
<OL>
<LI> CPU
<LI> INPUT DEVICES
<LI> OUTPUT DEVICES
<LI> HARD DISK
<LI> FLOPPY DISK
</OL>
</UL>
<BODY>
</HTML>
Example 2:
<HTML>
<HEAD>
<TITLE>Nesting List in HTML</TITLE>
</HEAD>
<BODY>
<UL TYPE= “square”>
<LI>SOFTWARE
<UL TYPE= “disc”>
<LI> C PROGRAMMING
<LI> DATABASE MANAGEMENT
<LI> NETWORKING
<LI> WEB TECHNOLOY
<LI> MOBILE TECHNOLOGY
</UL>
<LI> HARDWARE
<UL TYPE= “circle”>
<LI> CPU
<LI> INPUT DEVICES
<LI> OUTPUT DEVICES
<LI> HARD DISK
<LI> FLOPPY DISK
</UL>
</UL>
<BODY>
</HTML>
Definition List:
Definition lists group terms and definitions into a single list and requires three elements to complete the list:
- <DL>: Holds the list definitions (DL- Define the List)
- <DT>: Defines a term in the list (DT- Define the Term)
- <DD>: Defines a definition for the term (DD- Define the Definition)
In the definition list, we can have as many terms ( defined by <DT> ) as we need. Each term can have one or more definitions ( defined by <DD> ).
Example:
<HTML>
<HEAD>
<TITLE>Definition List</TITLE>
</HEAD>
<BODY>
<DL>
<DT>Hardware
<DD> Is defined as physical or tangible equipments associated with computer systems. Examples of hardware are Central Processing Unit, Input devices, Output Devices, Secondary Storage Devices.
<DT>Software
<DD>Is a set of programs
<DT>Peripherals
<DD>Equipment connected around the CPU
</BODY>
</HTML>
Hyperlink:
A hyperlink (or link) is a word, group of words, or image that we can click on to jump to another document or another section on the same page.
Hyperlinks, or simply links, connect HTML pages and other resources on the web. When we include a link on web page, we enable visitors to travel from our web page to another website, another web page on our site or even another location on the same page. We can also link to such resources that are not even HTML pages at all, such as e-mail addresses, pictures and text files etc. Without links, a web page stands alone, disconnected from the rest of the web. With links, that page becomes part of the web.
In HTML, <A> (Anchor) tag defines hyperlink. Anything between the opening <A> tag and the closing </A> tag becomes part of the link and a user can click that part to reach to the linked document.
The syntax of using <A> tag is:
<A href= “URL”> Link Text </A>
Here, the href attribute specifies the destinations of a link. The “Link Text” can be text or image.
The hypertext links is composed of three elements:
- Start and End tags that enclose the whole link
- The link target
- The link text
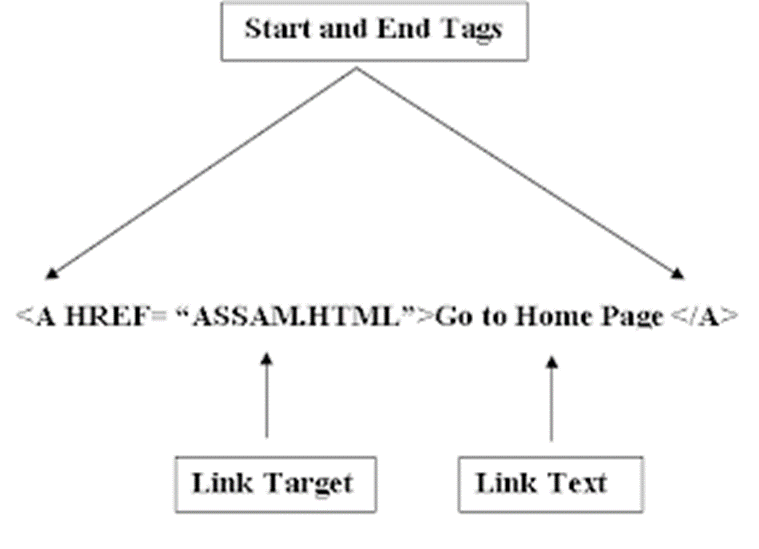
The figure illustrates the three parts of a hypertext links. The figure uses the HREF (Hypertext Reference) attribute to specify the URL or address of the “object” of the link, which is simply another Web page. Here the full address (URL) is not given, just the filename. This means that the web page being linked to is in the same directory as the web page from where the link is being made. If we want to form a link to a web page on another server, then the full URL should be specified.
Example:
<HTML>
<HEAD>
<TITLE> HYPERLINK</TITLE>
</HEAD>
<BODY BGCOLOR=”GREEN” LINK=”PURPLE” VLINK=”YELLOW” ALINK= “BLUE” TEXT=”MAROON”>
<H1> Hyperlinks connect HTML pages</H1>
<A HREF= “EX15.HTML”>Home Page </A>
<P><FONT SIZE=”5″ FACE=”MV BOLI”>A hyperlink (or link) is a word, group of words, or image that we can click on to jump to another document or another section on the same page. Hyperlinks, or simply links, connect HTML pages and other resources on the web. When we include a link on web page, we enable visitors to travel from our web page to another website, another web page on our site or even another location on the same page. We can also link to such resources that are not even HTML pages at all, such as e-mail addresses, pictures and text files etc. Without links, a web page stands alone, disconnected from the rest of the web. With links, that page becomes part of the web.
<P>The hypertext links is composed of three elements:
<UL>
<LI><A HREF=”EX1.HTML”>START & END TAGS</A>
<LI><A HREF=”EX2.HTML”>LINK TARGET</A>
<LI><A HREF=”EX3.HTML”>LINK TEXT</A>
</BODY>
</HTML>
Adding Images (Inserting images):
Images are very important to beautify as well as to depict many concepts on web page. It is true that one single image is worth a thousand words. So, as a web designer we should have clear understanding on how to use images in our web page.
We can add or insert an image in web page by using HTML <IMG> tag. The <IMG> tag is an empty tag, which means that it contains attributes only, and has no closing tag. To display an image on a web page, we need to use the SRC attribute of <IMG> tag. The SRC stands for “source”.
The syntax of using <IMG> tag is:
<IMG SRC= “imagefile”>
<IMG> Attributes:
| Attribute | Value | Description |
| src | URL | Specifies the URL or location of an image, where the image is stored |
| align | top, bottom, middle, left, right | Specifies the alignment of an image according to surrounding elements. |
| alt | text | Specifies an alternate text for an image, if the image cannot be displayed |
| title | text | Specifies title text as pop-up tips. |
| border | pixels | Specifies the width of the border around an image. |
| height | pixels | Specifies the height of an image. |
| width | pixels | Specifies the width of an image. |
| hspace | pixels | Specifies the white space on left and right side of an image |
| vspace | pixels | Specifies the white space on top and bottom of an image |
| usemap | #mapname | Specifies an image as a client-side image-map. (Used in Image mapping) |
Example:
<HTML>
<HEAD>
<TITLE> Images in HTML</TITLE>
</HEAD>
<BODY>
<IMG SRC= “NATURE.JPG” BORDER= “5” ALIGN= “RIGHT” ALT= “Sample Picture” TITLE= “Beautiful Picture” HEIGHT= “300” WIDTH= “250”, VSPACE= “20” HSPACE= “30”>
<P ALIGN=”JUSTIFY”><FONT SIZE=”5” COLOR=”BLUE” FACE=”MV BOLI”>
Images are very important to beautify as well as to depict many concepts on web page. It is true that one single image is worth a thousand words. So, as a web designer we should have clear understanding on how to use images in our web page.
<P ALIGN=”JUSTIFY”><FONT SIZE=”5″ COLOR=”GREEN” FACE=”MV BOLI”>Besides text, we can also include an image inside a hypertext link, which causes the image to display a blue border, indicating that it is a hypertext link that we can click and activate.
</BODY>
</HTML>
CREATING IMAGE LINKS:
Besides text, we can also include an image inside a hypertext link, which causes the image to display a blue border, indicating that it is a hypertext link that we can click and activate.
Web pages often use images for navigation. They are more appealing than plain- text links. To create an image that generates a link, we substitute an <IMG> tag in place of text to which we would anchor our link.
Example:
<HTML>
<HEAD>
<TITLE> Image as a Link</TITLE>
</HEAD>
<BODY>
<H3> Image Link</H3>
<A HREF= “EX5.html”><IMG SRC= “NATURE.JPG” BORDER= “5” ALT= “A Sample Picture” TITLE= “Beautiful Picture” HEIGHT= “300” WIDTH= “250”>
</A>
</BODY>
</HTML>
MARQUEE TAG:
Sometimes we might want our text or photos to continuously scroll across the screen. Or maybe we would like it to bounce back and forth across the screen. All these things are possible using HTML marquees.
HTML marquees are a piece of code that allows us to create movement on an HTML element (text or image). Usually marquees continuously scroll across the screen. This is possible by using HTML <MARQUEE>tag.
Syntax to use <MARQUEE>tag:
<MARQUEE attribute_name= “attribute_value”>Text or image </MARQUEE>
<MARQUEE> Attributes:
| Attribute | Value | Description |
| behavior | Scroll, slide, alternate | Specifies the type of scrolling |
| bgcolor | colorname | Specifies the background color |
| direction | Up, down, left, right | Specifies the scrolling direction of text |
| height | Pixels or Percentage, % | Specifies the height of marquee |
| width | Pixels or Percentage, % | Specifies the width of marquee |
| hspace | pixels | Specifies horizontal space around the marquee. |
| vspace | pixels | Specifies horizontal space around the marquee. |
| loop | number | Specifies how many times the marquee text scrolls |
| scrolldelay | milliseconds | Defines how long to delay between each jump. |
| scrollamount | number | Specifies how far to jump. |
Example:
<HTML>
<HEAD>
<TITLE> MARQUEE IN HTML </TITLE>
</HEAD>
<BODY>
<H2> TEXT SCROLLING </H2>
<MARQUEE BEHAVIOR= “SCROLL” BGCOLOR= “AQUA” DIRECTION= “LEFT” HEIGHT= “50%” WIDTH= “100%” LOOP= “3” SCROLLDELAY= “30” VSPACE= “20” HSPACE= “20”> WELLCOME TO BEAUTIFUL ASSAM </MARQUEE>
<H2> IMAGE SCROLLING </H2>
<MARQUEE BEHAVIOR=”SCROLL” BGCOLOR= “AQUA” DIRECTION= “UP” SCROLLAMOUNT= “10” HEIGHT= “35%” WIDTH= “100%” LOOP= “3” SCROLLDELAY= “30” VSPACE= “20” HSPACE= “20”>
<IMG SRC=”NATURE.JPG” HEIGHT=”200” WIDTH=”200”>
</MARQUEE>
</BODY>
</HTML>
TABLES:
In HTML, tables make it easy to lay out data, text and even images in a grid. Tables are just like spreadsheets and they are made up of rows and columns. They are very frequently used by almost all web developers to arrange data in a tabular format. Almost all major sites on the web are using invisible tables to layout the pages. The most important layout aspects that can be done with table are:
- Divide the page into different sections.
- Creating menus.
- Adding interactive form fields.
- Easy alignment of images that have been cut into smaller pieces.
- A simple way to allow text to be written in two or more columns next to each other.
In HTML, the <TABLE> tag is used to create a table. A table is divided into rows with the <TR> (Table Row) tag, and each row is divided into data cells with the <TD> (Table data) tag. The <TD> tag holds the content of a data cell. A <TD> tag can contain text, links, images, lists, forms etc.
Table Borders:
By default, the table does not contain a border. To include a border to the table, specify a BORDER attribute inside the <TABLE> tag. The BORDER attribute of <TABLE> tag controls the appearance of the table’s borders or lines. The default border is 0, so if we do not specify a border attribute, the table is displayed without any borders. Sometimes this is useful, but most of the time, we want the borders to be visible.
Example :
<HTML>
<HEAD>
<TITLE> TABLE WITH BORDERS </TITLE>
</HEAD>
<BODY>
<H4> TABLE WITH A NORMAL BORDER </H4>
<TABLE BORDER= “1”>
<TR>
<TD>FIRST</TD>
<TD>ROW</TD>
</TR>
<TR>
<TD>SECOND</TD>
<TD>ROW</TD>
</TR>
</TABLE>
<H4> TABLE WITH A THICK BORDER </H4>
<TABLE BORDER= “8”>
<TR>
<TD>FIRST</TD>
<TD>ROW</TD>
</TR>
<TR>
<TD>SECOND</TD>
<TD>ROW</TD>
</TR>
</TABLE>
<H4> TABLE WITH A VERY THICK BORDER </H4>
<TABLE BORDER= “15”>
<TR>
<TD>FIRST</TD>
<TD>ROW</TD>
</TR>
<TR>
<TD>SECOND</TD>
<TD>ROW</TD>
</TR>
</TABLE>
</BODY>
</HTML>
HEADING IN A TABLE:
Header information in a table is defined with the <TH> tag. All major browsers display the text in the <TH> element as bold and centered.
Adding Column Heading:
To create headings (column headings) at the top of the table, first create a row using the <TR> tag and then, use the <TH> tag to define the cells instead of using the <TD> tags.
Example:
<HTML>
<HEAD>
<TITLE> HEADINGS IN ATABLE </TITLE>
</HEAD>
<BODY>
<TABLE BORDER= “3”>
<TR>
<TH>ROLL NO</TH>
<TH>FIRST NAME</TH>
<TH>LAST NAME</TH>
<TH>ADDRESS</TH>
</TR>
<TR>
<TD>1</TD>
<TD>RAJIV</TD>
<TD>BELDAR</TD>
<TD>ASSAM</TD>
</TR>
<TR>
<TD>2</TD>
<TD>SAMUEL</TD>
<TD>DHAN</TD>
<TD>ASSAM</TD>
</TR>
<TR>
<TD>3</TD>
<TD>SULAGNA</TD>
<TD>SARKAR</TD>
<TD>TINSUKIA</TD>
</TR>
<TR>
<TD>4</TD>
<TD>RAJA</TD>
<TD>GOGOI</TD>
<TD>ASSAM</TD>
</TR>
</TABLE>
</BODY>
</HTML>
Add Row Headings:
To create a row heading add <TH> tag instead of a <TD> tag at the start of a table row.
<HTML>
<HEAD>
<TITLE> HEADINGS IN ATABLE </TITLE>
</HEAD>
<BODY>
<TABLE BORDER= “1”>
<TR>
<TH>ROLL NO</TH>
<TH>FIRST NAME</TH>
<TH>LAST NAME</TH>
<TH>ADDRESS</TH>
</TR>
<TR><TH>ROW1 :< /TH>
<TD>1</TD>
<TD>RAJIV</TD>
<TD>BELDAR</TD>
<TD>ASSAM</TD>
</TR>
<TR><TH>ROW2 :< /TH>
<TD>1</TD>
<TD>SAMUEL</TD>
<TD>DHAN</TD>
<TD>ASSAM</TD>
</TR>
</TABLE>
</BODY>
</HTML>
TABLE WITH A CAPTION:
It is a good idea to add a title or caption to a table that describes the table data. To add a caption to the table, <CAPTION> tag is used. There could be only one caption per table. The <CAPTION> tag is supported in all major browsers.
The following example demonstrates how to create a table with a caption:
Example:
<HTML>
<HEAD>
<TITLE> TABLE WITH CAPTION </TITLE>
</HEAD>
<BODY>
<TABLE BORDER= “1”>
<CAPTION><B>STUDENT DETAILS</B></CAPTION>
<TR>
<TD>1</TD>
<TD>RAJIV</TD>
<TD>BELDAR</TD>
<TD>ASSAM</TD>
</TR>
<TR>
<TD>2</TD>
<TD>SAMUEL</TD>
<TD>DHAN</TD>
<TD>ASSAM</TD>
</TR>
<TR>
<TD>3</TD>
<TD>PRATIMA</TD>
<TD>SHARMA</TD>
<TD>TINSUKIA</TD>
</TR>
<TR>
<TD>4</TD>
<TD>RAJA</TD>
<TD>GOGOI</TD>
<TD>ASSAM</TD>
</TR>
</TABLE>
</BODY>
</HTML>
<TABLE> ATTRIBUTES:
| Attribute | Value | Description |
| border | pixels | Specifies the border width. |
| bordercolor | colorname | Specifies the color of the table’s border. |
| align | right, left, center, justify | Specifies the alignment of a table. |
| bgcolor | colorname | Specifies the background color of the table |
| background | URL | Specifies the background image of table |
| height | pixels or perentage, % | Specifies the height of the table |
| width | pixels or parcentage, % | Specifies the width of the table |
| cellspacing | pixels | Specifies the space between cells |
| cellpadding | pixels | Specifies the space within each cell |
Example:
<HTML>
<HEAD>
<TITLE> TABLE ATTRIBUTES </TITLE>
</HEAD>
<BODY>
<TABLE BORDER= “10” BORDERCOLOR= “RED” ALIGN= “CENTER” BGCOLOR= “YELLOW” HEIGHT= “50%” WIDTH= “50%” CELLSPACING= “10” CELLPADDING=“30”>
<CAPTION><B>STUDENT DETAILS</B></CAPTION>
<TR>
<TH>ROLL NO</TH>
<TH>FIRST NAME</TH>
<TH>LAST NAME</TH>
<TH>ADDRESS</TH>
</TR>
<TR>
<TD>1</TD>
<TD>RAJIV</TD>
<TD>BELDAR</TD>
<TD>ASSAM</TD>
</TR>
<TR>
<TD>2</TD>
<TD>SAMUEL</TD>
<TD>DHAN</TD>
<TD>ASSAM</TD>
</TR>
<TR>
<TD>3</TD>
<TD>SULAGNA</TD>
<TD>SARKAR</TD>
<TD>ASSAM</TD>
</TR>
<TR>
<TD>4</TD>
<TD>YASH</TD>
<TD>SWAMI</TD>
<TD>ASSAM</TD>
</TR>
</TABLE>
</BODY>
</HTML>
<TR> ATTRIBUTES:
| Attribute | Value | Description |
| align | right, left, center, justify | Aligns the content in a table row |
| bgcolor | colorname | Specifies a background color of a row |
| valign | top, middle, bottom, baseline | Vertical aligns the content in table row |
<TH> ATTRIBUTES:
| Attribute | Value | Description |
| align | right, left, center, justify | Aligns the content in a header cell |
| bgcolor | colorname | Specifies a background color of a header cell |
| valign | top, middle, bottom, baseline | Vertical aligns the content in header cell |
| height | pixels | Specifies the height of a header cell |
| width | pixels | Specifies the width of a header cell |
| rowspan | number | Specifies the number of rows a header cell should span |
| colspan | number | Specifies the number of columns a header cell should span |
<TD> ATTRIBUTES:
| Attribute | Value | Description |
| align | right, left, center, justify | Aligns the content in a cell |
| bgcolor | colorname | Specifies a background color of a cell |
| valign | top, middle, bottom, baseline | Vertical aligns the content in a cell |
| height | pixels | Specifies the height of a cell |
| width | pixels | Specifies the width of a cell |
| rowspan | number | Specifies the number of rows a cell should span |
| colspan | number | Specifies the number of columns a cell should span |
Example-1:
<html>
<head>
<title>Table</title>
<table border=”1″>
<tr>
<th colspan=”2″>Name</th>
<th rowspan=”2″>Age</th>
</tr>
<tr>
<th>First Name</th>
<th>Last Name</th>
</tr>
<tr>
<td>Rahul</td>
<td>Sharma</td>
<td>30</td>
</tr>
<tr>
<td>Rakesh</td>
<td>Kumar</td>
<td>57</td>
</tr>
</table>
</body>
</html>
Example-2:
<html>
<body>
<table border=3>
<tr>
<td colspan=4><center>STUDENT REPORT</center></td>
</tr>
<tr>
<td>ROOL NO</td>
<td>NAME</td>
<td>ADDRESS</td>
</tr>
<tr>
<td>1</td>
<td>Rishi Baruah</td>
<td>Tinsukia</td>
</tr>
<tr>
<td>2</td>
<td>Ankita Gogoi</td>
<td>Digboi</td>
</tr>
<tr>
<td>3</td>
<td>Puja Sharma</td>
<td>Dibrugarh</td>
</tr>
<tr>
<td>4</td>
<td>Priya Sharma</td>
<td>Tinsukia</td>
</tr>
</body>
</html>
Example-3:
<HTML>
<HEAD>
<TITLE>ATTRIBUTE OF TABLE, ROWS AND COLUMNS</TITLE>
</HEAD>
<BODY>
<TABLE BORDER= “10” BORDERCOLOR= “RED” ALIGN= “CENTER” BGCOLOR= “YELLOW” HEIGHT= “50%” WIDTH= “50%” CELLSPACING= “10” CELLPADDING=“30”>
<CAPTION><B>STUDENT DETAILS</B></CAPTION>
<TR>
<TH COLSPAN=”2” BGCOLOR=”PINK”>NAME</TH>
<TH>CLASS </TH>
<TH>ROLL NUMBER</TH>
</TR>
<TR>
<TD ALIGN=”CENTER>BIPON</TD>
<TD ALIGN=”CENTER >BCA</TD>
<TD ALIGN=”CENTER >1</TD>
</TR>
<TR ALIGN=”CENTER >
<TD>BINOY</TD>
<TD ROWSPAN= “3” BGCOLOR= “PINK”>PGDCA</TD>
<TD>1</TD>
</TR>
<TR ALIGN=”CENTER >
<TD>MANAB</TD>
<TD BGCOLOR= “LIME”>BCOM</TD>
<TD>2</TD>
</TR>
<TR ALIGN=”CENTER >
<TD>DIRAJ</TD>
<TD>BCA</TD>
<TD>2</TD>
</TR>
</TABLE>
</BODY>
</HTML>
Example-4:
<HTML>
<HEAD>
<TITLE>TABLES</TITLE>
</HEAD>
<BODY>
<CENTER>
<TABLE BORDER= “1” CELLSPACING= “6” CELLPADDING=“6” WIDTH= “80%” >
<CAPTION><B>STUDENT DETAILS</B></CAPTION>
<TR>
<TH ROWSPAN=”2”><IMG SRC= “NATURE.JPG”> </TH>
<TH COLSPAN= “4” BGCOLOR=”BLUE” ><FONT SIZE= “7” COLOR= “GREEN” FACE= “ARIAL” > STUDENT REPORT </TH>
</TR>
<TR BGCOLOR= “LIME”>
<TH WIDTH= “20 %”> ROLL NO</TH>
<TH WIDTH= “20%” >FIRST NAME </TH>
<TH WIDTH= “20%” > LAST NAME </TH>
<TH WIDTH= “20%” > ADDRESS </TH>
</TR>
<TR>
<TH ALIGN= “RIGHT” >ROW 1:</TH>
<TD>1</TD>
<TD>ARJUN</TD>
<TD>SHARMA</TD>
<TD>ASSAM</TD>
</TR>
<TR>
<TH ALIGN= “RIGHT” >ROW 2:</TH>
<TD>2</TD>
<TD>ANKIT</TD>
<TD>SAIKIA</TD>
<TD>TINSUKIA</TD>
</TR>
</TABLE>
<CENTER>
</BODY>
</HTML>
FRAMES:
HTML allows us to divide a single browser window into several pieces or panes, called Frames. Each frame can contain a separate HTML document. So, frames allow us to display more than one HTML document in the same browser window simultaneously. Each frame is independent of the others. A collection of frames in the browser window is known as a FRAMESET.
There are few drawbacks also we should be aware of with frames. They are:
- The web developer must keep track of more HTML documents.
- It is difficult to print the entire page.
- Users often dislike them.
- It presents linking challenges.
- All web browsers do not support frames.
To create a frameset document, first we need the <FRAMESET> tag. The <FRAMESET> tag allows a web developer to define a multiple frame web page, where each frame displays its own HTML document. The <FRAMESET> tag defines how to divide the window into frames. Each frameset defines a set of rows or columns. The values of the rows/columns indicate the amount of screen area each row/column will occupy. Each frame is then represented by a <FRAME> tag. The <FRAME> tag defines which HTML document will initially open in each frame. Frames can be scrolled and resized by the user, unless scrolling and resizing is turned off.
Syntax:
<FRAMESET ROWS= “n, n”>
<FRAMESET COLS= “n, n”>
Example:
<FRAMESET ROWS=“80, 400”> (This is an absolute pixel dimension)
Defines 2 rows, with the top row being 80 pixels high and bottom row 400 pixels high. But it is better to use the percentage dimensions because if the frames are defined using absolute pixels, some browsers do not recognize it.
Percentage Dimensions:
We can define rows and columns as percentage of total height or width of the browser window.
Example: <FRAMESET ROWS= “80%, 20%”>
Defines 2 rows, top filling 80% of the browser window and bottom filling 20% of the total height of the browser window.
Relative Dimension:
<FRAMESET ROWS= “*, 100”>
Defines the top row as the “relative” row that expands or contracts depending on the total space available in the browser window, whereas the bottom row would remain fixed at the height of 100 pixels.
Frame: The <FRAME> tag is nested inside the <FRAMESET> tag. It is used to define frames that are included in the frameset.
Syntax:
<FRAME NAME= “framename” SRC= “URL” FRAMEBORDER= “1/0” MARGINHEIGHT= “pixels” MARGINWIDTH= “pixels” NORESIZE SCROLLING= “yes/no/auto”>
Vertical Frameset:
The following example demonstrates how to make a vertical frameset with three different frames.
Example:
<HTML>
<HEAD>
<TITLE> VERTICAL FRAMESET</TITLE>
</HEAD>
<FRAMESET COLS= “30%, 40%, 30%”>
<FRAME NAME= “F1”>
<FRAME NAME= “F2”>
<FRAME NAME= “F3”>
</FRAMESET>
</HTML>
Horizontal Frameset:
The following example demonstrates how to make a horizontal frameset with three different frames.
Example:
<HTML>
<HEAD>
<TITLE> HORIZONTAL FRAMESET</TITLE>
</HEAD>
<FRAMESET ROWS= “30%, 40%, 30 %”>
<FRAME NAME= “F1”>
<FRAME NAME= “F2”>
<FRAME NAME= “F3”>
</FRAMESET>
</HTML>
<NOFRAMES> TAG:
Every web browser does not support frames. The <NOFRAMES> tag is a special tag for browsers that do not support frames. <NOFRAMES> tag is used to provide contents in a frame page that we will be displayed by no-frame capable browsers.
The <NOFRAMES> tag is placed following the last <FRAME> tag, either before or after any </FRAMESET> end tags. However, if we add a <NOFRAMES> tag containing some text for browsers that do not support frames, we will have enclose the text in the <BODY> tag. The <NOFRAMES> tag goes inside the <FRAMESET> tag. It can contain all the HTML elements that we can find inside the <BODY> tag of a normal HTML page.
A no-frame capable browser will ignore the frameset element, while a frame capable browser will ignore the contents of the no-frame element.
Example:
<HTML>
<HEAD>
<TITLE> NOFRAMES TAG</TITLE>
</HEAD>
<FRAMESET ROWS= “30%, 40%, 30%”>
<FRAME NAME= “F1”>
<FRAME NAME= “F2”>
<FRAME NAME= “F3”>
<NOFRAMES>
<BODY>BROWSER DOES NOT HANDLE FRAMES</BODY>
</NOFRAMES>
</FRAMESET>
</HTML>
NOTE: If web browser supports frames, then the noframes text remains invisible.
<FRAMESET> Attributes:
| Attribute | Value | Description |
| cols | pixels or percentage, % | Specifies the number of columns and their width (sizes) |
| rows | pixels or percentage, % | Specifies the number of rows and their height (sizes) |
| border | pixels | Set the width of the borders. default width is 5 pixels |
| bordercolor | colorname | Specify the color of borders |
| frameborder | 0 or 1 | Specifies whether or not the frame should have a border |
<FRAME> Attributes:
| Attribute | Value | Description |
| frameborder | 0 or 1 | Specifies whether or not to display border around the frame |
| src | URL | Specifies the URL or location of the document to show in a frame |
| name | framename | Specifies the name of the frame |
| noresize | noresize | Specifies that a frame is not resizable. |
| scrolling | yes/no/auto | Specifies whether or not to display scrollbars in a frame. yes specifies that scollbars are to be added always , no specifies that no scrollbars will be provided , auto specifies that the scrollbar will be added as and when required |
| marginheight | pixels | Specifies the top and bottom margin of a frame |
| marginwidth | pixels | Specifies the left and right margin of a frame |
Example:
<HTML>
<HEAD>
<TITLE> FRAMES IN HTML</TITLE>
</HEAD>
<FRAMESET COLS= “40%, *” border=”10″ bordercolor=”blue”>
<FRAME NAME= “F1” SRC= “NATURE.JPG” FRAMEBORDER= “0” MARGINHEIGHT= “30” MARGINWIDTH= “30” SCROLLING= “AUTO” NORESIZE>
<FRAME NAME= “F2” SCROLLING= “YES” FRAMEBORDER= “1” NORESIZE >
</FRAMESET>
</HTML>
Example to Create 2 Row Frames:
<HTML>
<HEAD>
<TITLE> TWO ROW FRAMES IN HTML</TITLE>
</HEAD>
<FRAMESET ROWS= “40%, 60%” border=”10″ bordercolor=”green”>
<FRAME NAME= “TOP_BAR” SRC= “EX20.HTML” MARGINHEIGHT= “3” MARGINWIDTH= “3” SCROLLING= “AUTO” NORESIZE>
<FRAME NAME= “BOTTOM_BAR” SRC= “EX21.HTML” MARGINHEIGHT= “3” MARGINWIDTH= “3” SCROLLING= “AUTO” NORESIZE>
</FRAMESET>
<NOFRAMES>
<BODY BGCOLOR= GREEN” TEXT= “RED” LINK= “LIME” >SORRY, THIS PAGE REQUIRES A FRAMES CAPABLE BROWSERS
</BODY>
</NOFRAMES>
</HTML>
Example to Create 2 Columns Frames:
<HTML>
<HEAD>
<TITLE> TWO COLUMNS FRAMES IN HTML</TITLE>
</HEAD>
<FRAMESET COLS= “40%, 60%”>
<FRAME NAME= “LEFT_BAR” SRC= “EX20.HTML” MARGINHEIGHT= “3” MARGINWIDTH= “3” SCROLLING= “AUTO” NORESIZE>
<FRAME NAME= “RIGHT_BAR” SRC= “EX21.HTML” MARGINHEIGHT= “3” MARGINWIDTH= “3” SCROLLING= “AUTO” NORESIZE>
</FRAMESET>
<NOFRAMES>
<BODY BGCOLOR= GREEN” TEXT= “RED” LINK= “LIME” >SORRY, THIS PAGE REQUIRES A FRAMES CAPABLE BROWSERS
</BODY>
</NOFRAMES>
</HTML>
Example for Creating 2 rows with second row containing two Columns:
<HTML>
<HEAD>
<TITLE> CREATING ROW AND COLUMN FRAMES</TITLE>
</HEAD>
<FRAMESET ROWS= “35%, 65%”>
<FRAME NAME= “TOP_BAR” SRC= “EX20.HTML” MARGINHEIGHT= “3” MARGINWIDTH= “3” SCROLLING= “AUTO” NORESIZE>
<FRAMESET COLS= “25%, 75%”>
<FRAME NAME= “LEFT_BAR” SRC= “EX21.HTML” MARGINHEIGHT= “3” MARGINWIDTH= “3” SCROLLING= “AUTO” NORESIZE>
<FRAME NAME= “RIGHT_BAR” SRC= “EX22.HTML” MARGINHEIGHT= “3” MARGINWIDTH= “3” SCROLLING= “AUTO” NORESIZE>
</FRAMESET>
</FRAMESET>
<NOFRAMES>
<BODY BGCOLOR= GREEN” TEXT= “RED” LINK= “LIME” >SORRY, THIS PAGE REQUIRES A FRAMES CAPABLE BROWSERS
</BODY>
</NOFRAMES>
</HTML>
Forms in Web pages:
In HTML, Forms are used to collect different kinds of user input. For example, Forms are required when we want to collect some data (like name, e-mail address, contact number etc.) from the site visitors who visit site.
A form is an area that can contain form elements. Form elements are like text fields, textarea fields, drop-down menus, radio buttons, checkboxes, etc. which are used to take information from the user.
A form is defined with the <FORM> tag. Within the <FORM>…</FORM> tags, all other form related tags and text must appear. The <FORM> tag can contain one more of the following form tags:
- <INPUT>
- <SELECT>
- <OPTION>
- <TEXTAREA>
- <BUTTON>
- <FIELDSET>
- <LABEL>
<INPUT> Tag and Attributes:
The most used <FORM> tag is the <INPUT> tag specifies an input field where the user can input or enter data. The type of input is specified with the type attribute. The following types are the most commonly used input types:
(i) Text
(ii) Number
(iii) Checkbox
(iv) Radio
(v) Date
(v) File
(vi) Submit
(vii) Reset
(vii) Password
Example:
<HTML>
<HEAD>
<TITLE> INPUT ELEMENT IN HTML FORM</TITLE>
</HEAD>
<BODY>
<H3><U>HTML FORM</U></H3><BR><BR>
<FORM>
USER NAME:<INPUT TYPE=”TEXT” NAME=”NM” SIZE=”20″ MAXLENGTH=”10″><BR><BR>
PASSWORD :<INPUT TYPE= “PASSWORD” NAME=”PWD” SIZE=”20″ MAXLENGTH=”8″><BR><BR>
PHONE NO :<INPUT TYPE= “NUMBER” NAME=”PHN”><BR><BR>
GENDER : MALE<INPUT TYPE=”RADIO” NAME=”R1″ VALUE=”M”>
FEMALE<INPUT TYPE=”RADIO” NAME=”R1″ VALUE=”F”>
OTHERS<input TYPE=”RADIO” NAME=”R1″ VALUE=”O”><BR><BR>
INTERESTS: MUSIC<INPUT TYPE=”CHECKBOX” NAME=”C1″ VALUE=”MUSIC”>
MOVIES<INPUT TYPE=”CHECKBOX” NAME=”C2″ VALUE=”MOVIES”>
SURFING<INPUT TYPE=”CHECKBOX” NAME=”C3″ VALUE=”SURFING”>
READING<INPUT TYPE= “CHECKBOX” NAME=”C4″ VALUE=”READING”><BR><BR>
DATE OF BIRTH:<input TYPE =”DATE” NAME=”DOB” ><BR><BR>
PHOTO:<INPUT TYPE=”FILE” NAME=”MYFILE”><BR><BR>
<INPUT TYPE=”SUBMIT” VALUE=”SUBMIT”>
<INPUT TYPE=”RESET” VALUE=”CANCEL”>
</FORM>
</BODY>
</HTML>
Output:

Drop-Down List:
A drop-down list in HTML is created using the <select> tag along with nested <option> tags. It allows users to select one or multiple options from a predefined list.
Key Attributes for Drop-Down (<select>):
name: Assigns a name to the drop-down, used when submitting form data.
size: Defines the number of visible options. It can be used to display a list box (instead of a drop-down).
multiple: Allows users to select multiple options (renders as a list box with multiple selection).
Attributes for Drop-Down Options (<option>):
value: Defines the value sent when the option is selected. This is important for form submission.
selected: Pre-selects the option when the page loads.
Example:
<HTML>
<HEAD>
<TITLE>DROP-DOWN LIST IN HTML FORM</TITLE>
</HEAD>
<BODY>
<H3><U> DROP-DOWN LIST IN HTML FORM</U></H3><BR><BR>
<FORM>
<SELECT NAME=”CARS” SIZE=”2″ MULTIPLE>
<OPTION VALUE=”VOLVO”> VOLVO</OPTION>
<OPTION VALUE=”SAAB”> SAAB</OPTION>
<OPTION VALUE=”MERCEDES”> MERCEDES</OPTION>
<OPTION VALUE=”FIAT” SELECTED=”SELECTED”> FIAT</OPTION>
<OPTION VALUE=”AUDI”> AUDI</OPTION>
</SELECT>
</FORM>
</BODY>
</HTML>
Output:

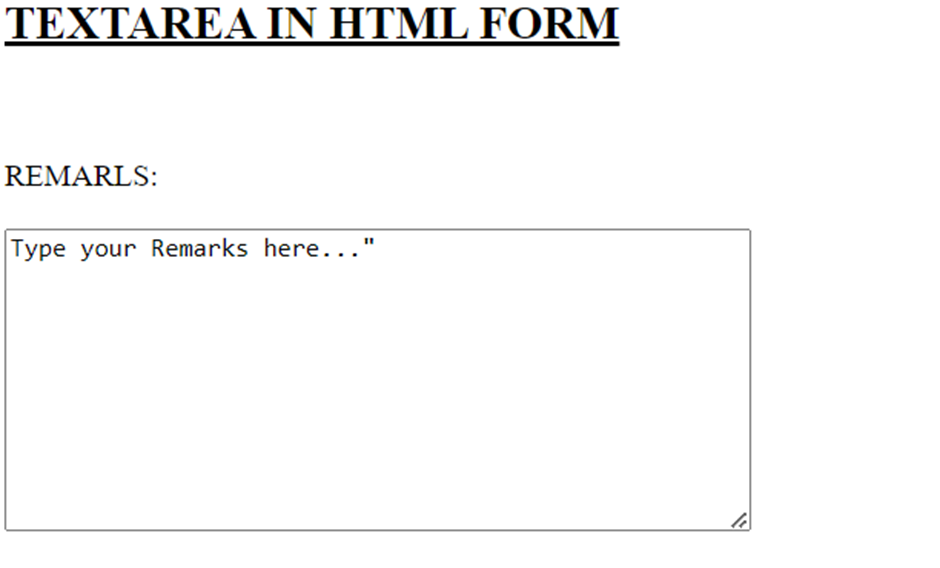
<TEXTAREA> Tag and Attribute:
The <textarea> tag in HTML is used to create a multi-line text input field. It’s typically used for entering longer blocks of text, such as comments, descriptions, or messages, where a single-line input wouldn’t suffice.
Key Attributes of <textarea>:
name: The name of the textarea, which is useful when the form is submitted (the content will be sent under this name).
rows: Specifies the number of visible text lines in the text area (i.e., its height).
cols: Specifies the visible width of the text area in terms of the number of characters.
maxlength: Limits the maximum number of characters the user can input.
Example:
<HTML>
<HEAD>
<TITLE>TEXTAREA IN HTML FORM</TITLE>
</HEAD>
<BODY>
<H2><U> TEXTAREA IN HTML FORM</U></H2><BR><BR>
<FORM>
<LABEL FOR=”REMARKS”> REMARKS:</LABEL><BR><BR>
<TEXTAREA NAME=”REMARKS” ROWS=”10″ COLS=”50″ MAXLENGTH=”200″>
Type your Remarks here…”
</TEXTAREA>
</FORM>
</BODY>
</HTML>
Output:
<BUTTON> Tag and Attribute:
The <button> tag in HTML is used to create clickable buttons.
Example:
<HTML>
<HEAD>
<TITLE>BUTTONS IN HTML FORM</TITLE>
</HEAD>
<BODY>
<H2><U>BUTTONS IN HTML FORM</U></H2>
<FORM>
<label for=”name”>Name:</label>
<input type=”text” id=”name” name=”name”><br><br>
<button type=”submit”>Submit</button>
<button type=”reset”>Cancel</button>
</FORM>
</BODY>
</HTML>
Output:

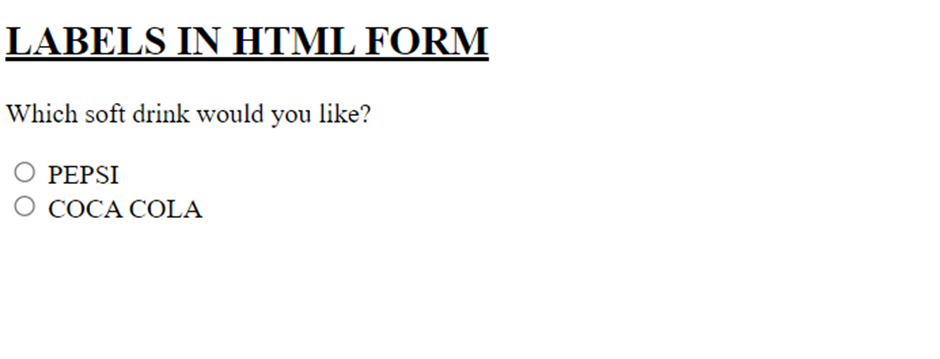
<LABEL> Tag:
The <label> tag is used to associate a text label with a form <input> field. The label is used to tell users the value that should be entered in the associated input field. The <label> tag needs an “for” attribute whose value is the same as the input id.
Example:
<HTML>
<HEAD>
<TITLE>LABELS IN HTML FORM</TITLE>
</HEAD>
<BODY>
<H2><U>LABELS IN HTML FORM</U></H2>
<P>Which soft drink would you like?
<FORM>
<input type=”radio” name=”drink” id=”pepsi”>
<LABEL FOR=”pepsi”>PEPSI</LABEL><BR>
<INPUT TYPE=”radio” NAME=”drink” ID=“cocacola”>
<LABEL FOR=”cocacola”>COCA COLA</LABEL>
</FORM>
</BODY>
</HTML>
Output:
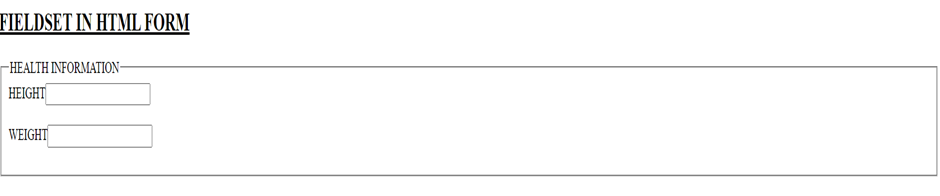
<FIELDSET> Tag:
The <fieldset> tag in HTML is used to group related elements within a form. It helps to organize form content by visually grouping related inputs and labels together, typically with a border around them. The <fieldset> tag is often used with the <legend> tag to provide a caption for the group of form elements.
Example:
<HTML>
<HEAD>
<TITLE>FIELDSET IN HTML FORM</TITLE>
</HEAD>
<BODY>
<H2><U>FIELDSET IN HTML FORM</U></H2>
<FIELDSET>
<LEGEND>HEALTH INFORMATION </LEGEND>
<FORM>
HEIGHT <INPUT TYPE = “TEXT” SIZE = “3”> <BR><BR>
WEIGHT <INPUT TYPE = “TEXT” SIZE = “3”>
</FORM>
</FIELDSET>
</BODY>
</HTML>
Output:
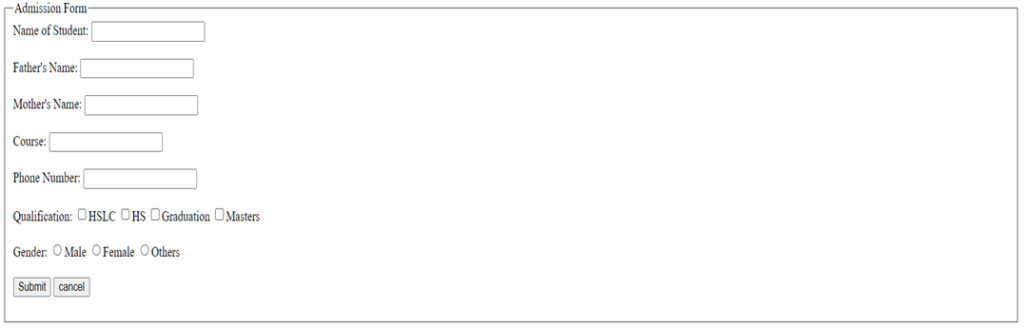
Example of the <FORM> tag and its Different Attributes:
Example-1
<html>
<head>
<title>Admission Form</title>
</head>
<body>
<fieldset>
<legend>Admission Form</legend>
<form>
Name of Student:<input name= “name” type=”text” size=”20″ maxlength=”25″><br><br>
Father’s Name:<input name= “name” type=”text” size=”20″ maxlength=”25″ ><br><br>
Mother’s Name:<input name= “name” type=”text” size=”20″ maxlength=”25″><br><br>
Course:<input name=”course” type=”text” size=”20″ maxlength=”25″><br><br>
Phone Number:<input name=”phone” type=”number” maxlength=”10″><br><br>
Qualification:<input name=”qua” type=”checkbox “value=”hslc”>HSLC
<input name=”qua” type=”checkbox” value=”hs”>HS
<input name=”qua” type=”checkbox” value=”graduation”>Graduation
<input name=”qua” type=”checkbox” value=”post graduation”>Post Graduation<br><br>
Gender:<input name=”gen” type=”radio” value=”m”>Male
<input name=”gen” type=”radio” value=”f”>Female
<input name=”gen” type=”radio” value=”o”>Others<br><br>
<input type=”submit” value=”Submit”>
<input type=”reset” value=”cancel”>
</fieldset>
</form>
</body>
</html>
Output of the above code:
Example-2
<html>
<head>
<title>Registration Form</title></head>
<body>
<fieldset>
<legend>Registration Form </legend>
<form>
Candidate Name:<input name=”name” type= “text” maxlength=”20″ size=”30″ placeholder=”CAPITAL LETTERS”> <br><br>
Phone No:<input name= “phn” type=”number” maxlength= “10”><br><br>
Date of Birth:<input name= “dob” type= “date”><br><br>
Gender:<input name= “gen” type= “radio” value=”m”>Male
<input name= “gen”type= radio value=”f”>Female
<input name= “gen” type=radio value=”o”>Others<br><br>
City:<select name=”city”>
<option values =” “>——–select your option———</option>
<option>Tinsukia</option>
<option>Jorhat</option>
<option>Dibrughar</option>
<option>Nogao</option>
<option>Guwahati</option>
</select><br><br>
Educational Qualification:<input name=”ed” type=”checkbox” value=”hslc”>HSLC
<input name=”ed” type=”checkbox” value=”hs”>HS
<input name= “ed” type=”checkbox” value=”graduation”>GRADUATION
<input name= “ed” type=”checkbox” value=”post graduation”>POST GRADUATION <br><br>
Photo:<input type=”file” name=”myfile”><br><br>
<input type=”submit” value=”Submit”>
<input type=”reset” value=”Cancel”>
</form>
</fieldset>
</body>
</html>
Output of the above code:

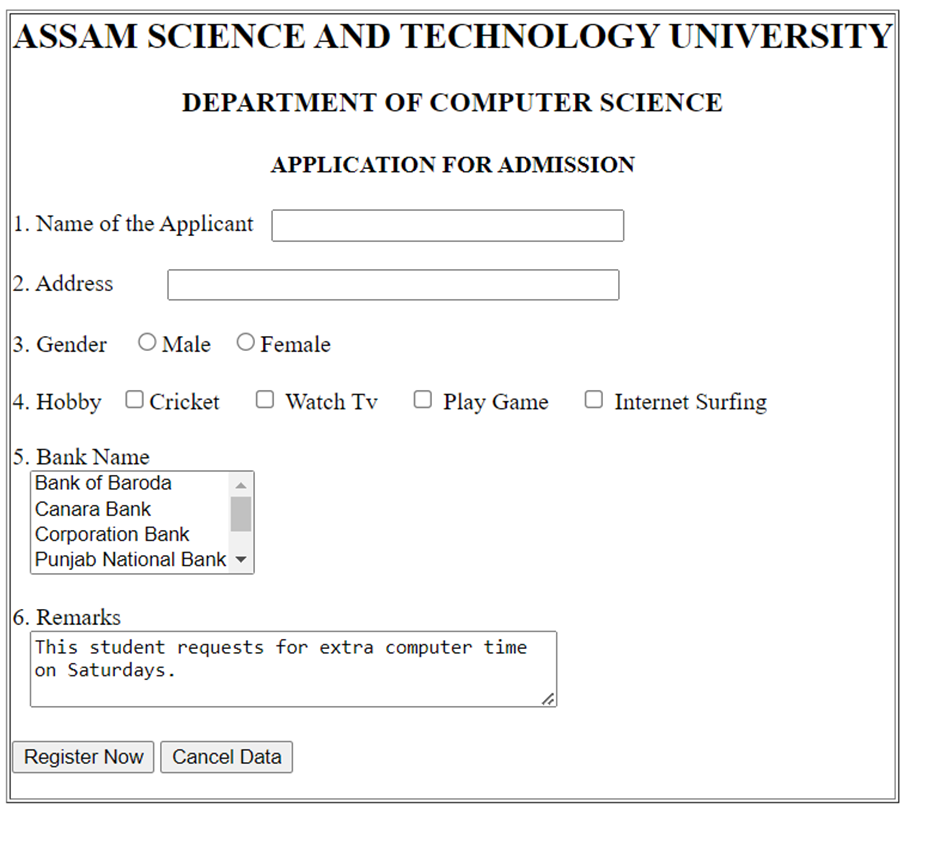
Example-3
<HTML>
<HEAD>
<TITLE>APPLICATION FORM</TITLE>
</HEAD>
<BODY>
<TABLE BORDER= “3”>
<TR>
<TD>
<CENTER>
<H2>ASSAM SCIENCE AND TECHNOLOGY UNIVERSITY</H2>
<H3>DEPARTMENT OF COMPUTER SCIENCE</H3>
<H4>APPLICATION FOR ADMISSION</H4>
</CENTER>
<FORM>
1. Name of the Applicant     <INPUT NAME=”NAME” TYPE=”TEXT” SIZE=”30″ MAXLENGTH=”25″><BR><BR>
2. Address           <INPUT NAME= “ADDRESS” TYPE=“TEXT” SIZE=”40″ MAXLENGTH=“25”><BR><BR>
3. Gender    <INPUT NAME=“GENDER” TYPE=”RADIO” VALUE=”M”>Male    <INPUT NAME=”GENDER” TYPE=”RADIO” VALUE=“F”>Female<BR><BR>
4. Hobby   <INPUT NAME=”CRICKET” TYPE=”CHECKBOX” VALUE=”CRICKET”>Cricket    
<INPUT NAME=”WATCHTV” TYPE=”CHECKBOX” VALUE=”WATCHTV”> Watch Tv    
<INPUT NAME=”PLAYGAME” type=”CHECKBOX” VALUE=”PLAYGAME”> Play Game    
<INPUT NAME=”INSERF” TYPE=”CHECKBOX” VALUE=”INSERF”> Internet Surfing<BR><BR>
5. Bank Name<BR>
   <SELECT NAME=”BANK” SIZE=”4″>
<OPTION>Bank of Baroda
<OPTION>Canara Bank
<OPTION>Corporation Bank
<OPTION>Punjab National Bank
<OPTION>State Bank of India
<OPTION>Union Bank
</SELECT>
<BR><BR>
6. Remarks <BR>
   <TEXTAREA NAME=“REMARKS” ROWS=”3″ COLS=”45″>This student requests for extra computer time on Saturdays.</TEXTAREA><BR><BR>
<INPUT TYPE=”SUBMIT” VALUE=”Register Now”>
<INPUT TYPE=”RESET” VALUE=”Cancel Data”>
</TD>
</TR>
</TABLE>
</FORM>
</BODY>
</HTML>
Output of the above code:
HTML Audio and Video:
<html>
<head>
<title>Audio and Video</title>
</head>
<body>
<audio controls>
<source src=”testing.mp3″ type=”audio/mp3″>
</audio>
<br>
<br>
<video width=”320″ height=”240″ controls>
<source src=”video.mp4″ type=”video/mp4″>
</video>
</body>
</html>